Terjemahan disediakan oleh mesin penerjemah. Jika konten terjemahan yang diberikan bertentangan dengan versi bahasa Inggris aslinya, utamakan versi bahasa Inggris.
Mengembangkan fungsi Lambda secara lokal dengan VS Code
Anda dapat memindahkan fungsi Lambda Anda dari konsol Lambda ke Visual Studio Code, yang menyediakan lingkungan pengembangan penuh dan memungkinkan Anda untuk menggunakan opsi pengembangan lokal lainnya seperti dan. AWS SAM AWS CDK
Manfaat utama pembangunan lokal
Sementara konsol Lambda menyediakan cara cepat untuk mengedit dan menguji fungsi, pengembangan lokal menawarkan kemampuan yang lebih canggih:
-
Fitur IDE lanjutan: Debugging, penyelesaian kode, dan alat refactoring
-
Pengembangan offline: Bekerja dan uji perubahan secara lokal sebelum penerapan cloud
-
Infrastruktur sebagai integrasi kode: Penggunaan tanpa batas dengan AWS SAM, AWS CDK, dan Komposer Infrastruktur
-
Manajemen ketergantungan: Kontrol penuh atas dependensi fungsi
Prasyarat
Sebelum mengembangkan fungsi Lambda secara lokal di VS Code, Anda harus memiliki:
-
Kode VS: Untuk petunjuk penginstalan, lihat Unduh Kode VS
. -
AWS Toolkit for Visual Studio Code: Untuk petunjuk penginstalan, lihat Menyiapkan AWS Toolkit for Visual Studio Code. Untuk ikhtisar, lihat AWS Toolkit for Visual Studio Code
. -
AWS kredensial: Untuk informasi tentang mengonfigurasi kredensil, lihat Menyiapkan kredensil Anda. AWS
-
AWS SAMCLI: Untuk petunjuk penginstalan, lihat Menginstal AWS SAMCLI.
-
Docker diinstal (opsional, tetapi diperlukan untuk pengujian lokal): Untuk petunjuk instalasi, lihat Mendapatkan Docker
.
catatan
Jika Anda sudah memiliki AWS akun dan profil yang dikonfigurasi secara lokal, pastikan bahwa kebijakan AdministratorAccess terkelola ditambahkan ke AWS profil yang dikonfigurasi.
Kontrol autentikasi dan akses
Untuk mengembangkan fungsi Lambda secara lokal, Anda memerlukan AWS kredensil untuk mengakses dan mengelola AWS sumber daya dengan aman atas nama Anda, seperti yang mereka lakukan di cloud. AWS Toolkit for VS Code mendukung metode otentikasi berikut:
AWS Toolkit for VS Code mendukung metode otentikasi berikut:
-
Kredensi jangka panjang pengguna IAM
-
Kredensi sementara dari peran yang diasumsikan
-
Federasi identitas
-
AWS kredensi pengguna root akun (tidak disarankan)
Bagian ini memandu Anda untuk memperoleh dan mengonfigurasi kredensil ini menggunakan kredensil jangka panjang pengguna IAM.
Dapatkan Kredensial IAM
Jika Anda sudah memiliki pengguna IAM dengan kunci akses, siapkan ID kunci akses dan kunci akses rahasia untuk bagian berikutnya. Jika Anda tidak memiliki kunci ini, ikuti langkah-langkah berikut untuk membuatnya:
catatan
Anda harus menggunakan ID kunci akses dan kunci akses rahasia bersama-sama untuk mengautentikasi permintaan Anda.
Untuk membuat pengguna IAM dan kunci akses:
-
Buka konsol IAM di https://console.aws.amazon.com/iam/
-
Di panel navigasi, pilih Users (Pengguna).
-
Pilih Create user (Buat pengguna).
-
Untuk Nama pengguna, masukkan nama dan pilih Berikutnya.
-
Di bawah Setel izin, pilih Lampirkan kebijakan secara langsung.
-
Pilih AdministratorAccessdan pilih Berikutnya.
-
Pilih Create user (Buat pengguna).
-
Di spanduk sukses, pilih Lihat pengguna.
-
Pilih Buat access key.
-
Untuk kasus penggunaan, pilih Kode lokal.
-
Pilih kotak centang konfirmasi dan pilih Berikutnya.
-
(Opsional) Masukkan nilai tag deskripsi.
-
Pilih Buat access key.
-
Salin kunci akses dan kunci akses rahasia Anda segera. Anda tidak akan dapat mengakses kunci akses rahasia lagi setelah Anda meninggalkan halaman ini.
penting
Jangan pernah membagikan kunci rahasia Anda atau berkomitmen untuk kontrol sumber. Simpan kunci ini dengan aman dan hapus saat tidak diperlukan lagi.
catatan
Untuk informasi selengkapnya, lihat Membuat pengguna IAM di AWS akun Anda dan Mengelola kunci akses untuk pengguna IAM di Panduan Pengguna IAM.
Konfigurasikan AWS kredensional menggunakan Toolkit AWS
Tabel berikut merangkum proses penyiapan kredenal yang akan Anda selesaikan dalam prosedur berikut.
| Apa yang harus dilakukan | Kenapa? |
|---|---|
| Buka panel Masuk | Mulai otentikasi |
| Gunakan Command Palette, cari AWS Add a New Connection | Mengakses UI masuk |
| Pilih IAM Credential | Gunakan kunci akses Anda untuk akses terprogram |
| Masukkan nama profil, kunci akses, kunci rahasia | Memberikan kredensi untuk koneksi |
| Lihat Pembaruan AWS Explorer | Konfirmasikan bahwa Anda terhubung |
Selesaikan langkah-langkah berikut mengautentikasi ke AWS akun Anda:
-
Buka panel Masuk di VS Code:
-
Untuk memulai proses otentikasi, pilih AWS ikon di panel navigasi kiri atau buka Palet Perintah (Cmd+Shift+P di Mac atau Ctrl+Shift+P di Windows/Linux) dan cari dan pilih Tambahkan Koneksi Baru.AWS
-
-
Di panel masuk, pilih IAM Credentials dan pilih Continue.
catatan
Untuk melanjutkan, Anda harus mengizinkan Ekstensi AWS IDE untuk Kode VS untuk mengakses data Anda.
-
Masukkan nama profil Anda, ID kunci akses, dan kunci akses rahasia, lalu pilih Lanjutkan.
-
Verifikasi koneksi dengan memeriksa AWS Explorer di VS Code untuk AWS layanan dan sumber daya Anda.
Untuk informasi tentang menyiapkan autentikasi dengan kredensi jangka panjang, lihat Menggunakan kredensil jangka panjang untuk mengautentikasi dan alat. AWS SDKs
Untuk informasi tentang mengonfigurasi autentikasi, lihat AWS kredensil IAM di Panduan Pengguna. AWS Toolkit for Visual Studio Code
Pindah dari konsol ke pengembangan lokal
catatan
Jika Anda telah membuat perubahan di konsol, pastikan Anda tidak memiliki perubahan yang tidak diterapkan sebelum beralih ke pengembangan lokal.
Untuk memindahkan fungsi Lambda dari konsol Lambda ke VS Code, selesaikan langkah-langkah berikut:
-
Buka Konsol Lambda
. -
Pilih nama fungsi Anda.
-
Pilih tab Sumber kode.
-
Pilih Buka di Kode Visual Studio.
catatan
Tombol Buka di Visual Studio Code hanya tersedia di AWS Toolkit versi 3.69.0 dan yang lebih baru. Jika Anda memiliki versi AWS Toolkit yang lebih lama diinstal, Anda mungkin melihat
Cannot open the handlerpesan di VS Code. Untuk mengatasi hal ini, perbarui AWS Toolkit Anda ke versi terbaru. -
Saat diminta, izinkan browser Anda membuka VS Code.
Saat Anda membuka fungsi di VS Code, Lambda membuat proyek lokal dengan kode fungsi Anda di lokasi sementara yang dirancang untuk pengujian dan penerapan cepat. Ini termasuk kode fungsi, dependensi, dan struktur proyek dasar yang dapat Anda gunakan untuk pengembangan lokal.
Untuk detail tentang penggunaan AWS di VS Code, lihat Panduan AWS Toolkit for Visual Studio Code Pengguna.
Bekerja dengan fungsi lokal
Setelah membuka fungsi Anda di VS Code, ikuti langkah-langkah berikut untuk mengakses dan mengelola fungsi Anda:
-
Pilih AWS ikon di bilah sisi untuk membuka AWS Explorer:

-
Di AWS Explorer, pilih wilayah dengan fungsi Lambda Anda:
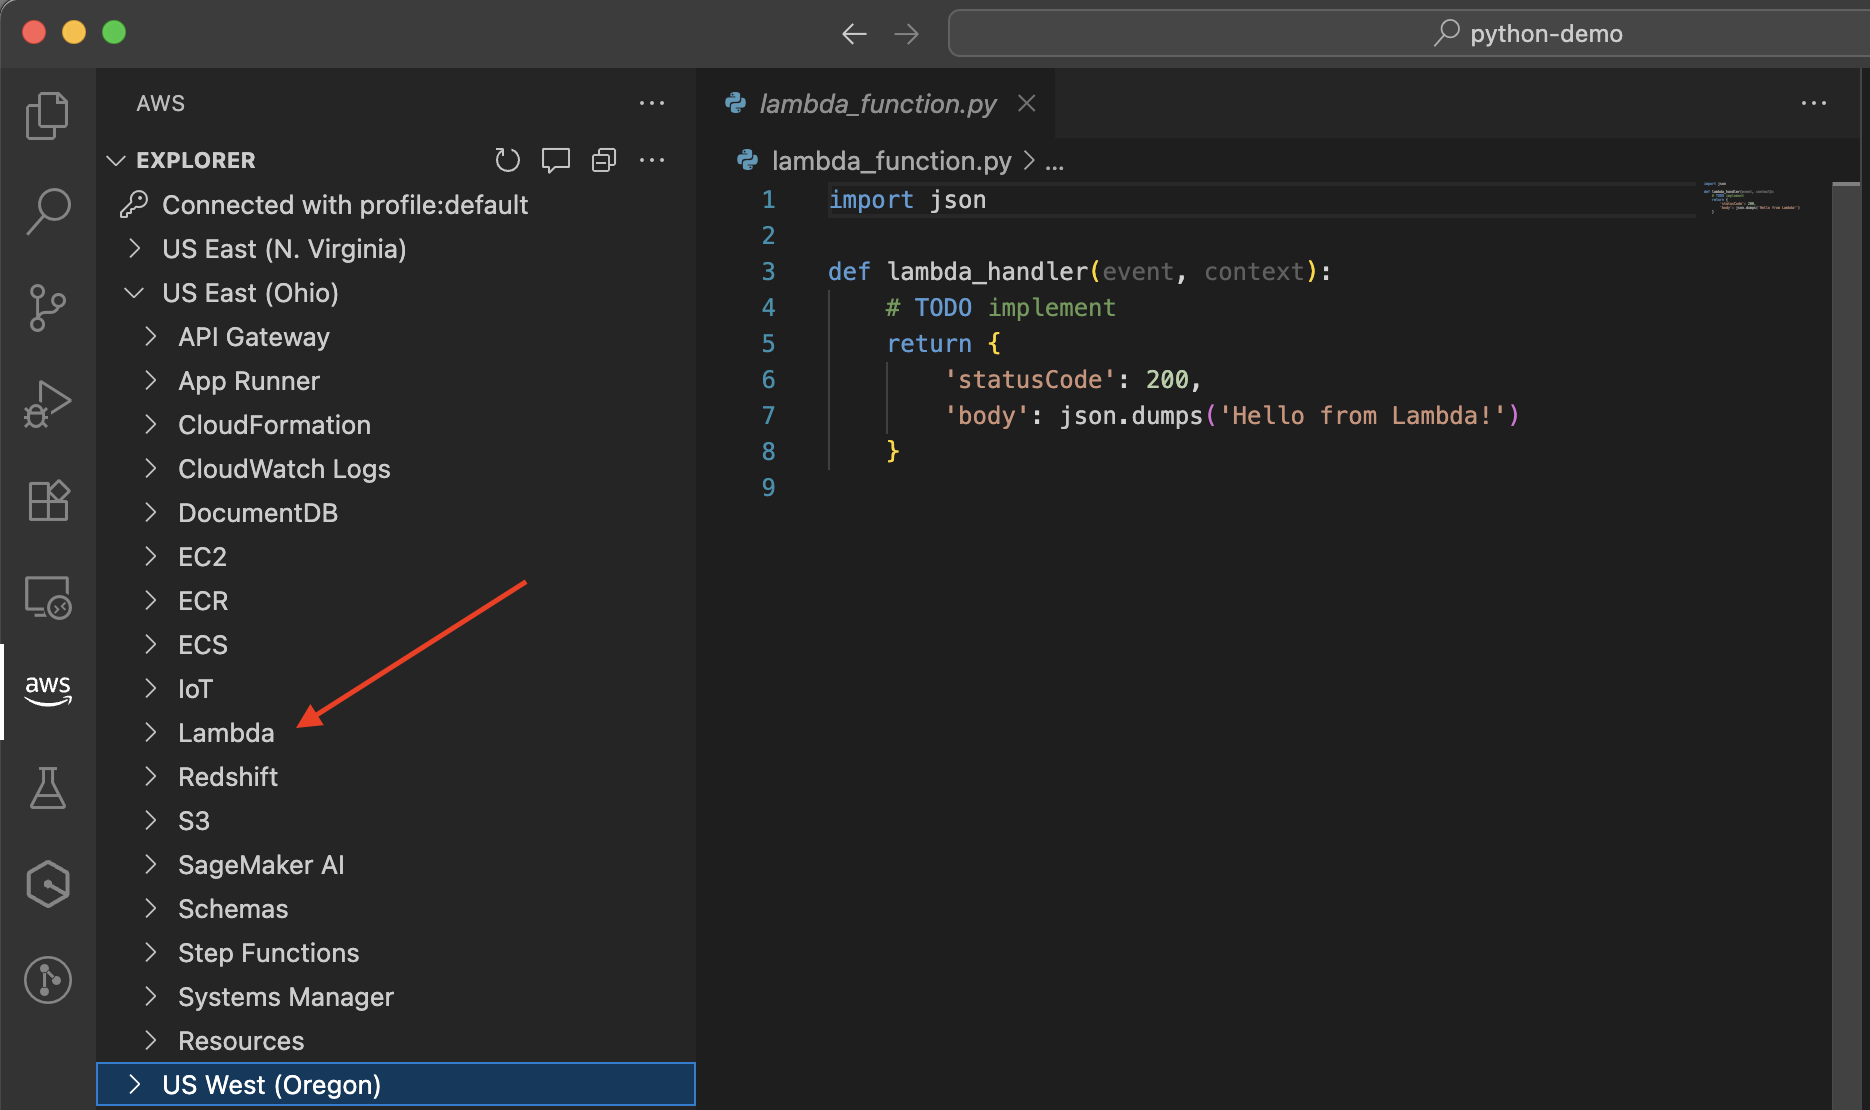
-
Di bawah wilayah yang Anda pilih, perluas bagian Lambda untuk melihat dan mengelola fungsi Anda:

Dengan fungsi Anda dibuka di VS Code, Anda dapat:
-
Edit kode fungsi dengan dukungan bahasa penuh dan penyelesaian kode.
-
Gunakan LocalStack integrasi dalam VS Code untuk menguji fungsi Lambda yang melakukan panggilan API ke yang lain Layanan AWS selama eksekusi, seperti membaca dari tabel DynamoDB atau menulis ke bucket Amazon S3. LocalStack adalah emulator layanan cloud yang menyediakan lingkungan pengembangan lokal lengkap untuk menguji integrasi layanan. Anda juga dapat menggunakan AWS SAMCLI untuk menguji fungsi Anda dalam wadah lokal. Jika fungsi Anda membuat panggilan API ke panggilan lain, panggilan Layanan AWS tersebut akan mencapai AWS sumber daya nyata, bukan yang ditiru.
-
Debug fungsi Anda dengan breakpoint dan inspeksi variabel. Untuk informasi selengkapnya, lihat Menjalankan dan men-debug fungsi Lambda langsung dari kode di Panduan Pengguna AWS Toolkit for Visual Studio Code .
-
Terapkan kembali fungsi Anda yang diperbarui untuk AWS menggunakan ikon cloud.
-
Instal dan kelola dependensi untuk fungsi Anda.
Untuk informasi selengkapnya, lihat Bekerja dengan fungsi AWS Lambda di AWS Toolkit for Visual Studio Code Panduan Pengguna.
Konversikan fungsi Anda ke AWS SAM templat dan gunakan alat IAc
Di VS Code, Anda dapat mengonversi fungsi Lambda Anda ke AWS SAM templat dengan memilih ikon Konversi ke AWS SAM Aplikasi di sebelah fungsi Lambda Anda. Anda akan diminta untuk memilih lokasi AWS SAM proyek. Setelah dipilih, fungsi Lambda Anda akan dikonversi ke template.yaml file yang disimpan di proyek baru AWS SAM Anda.
Dengan fungsi Anda dikonversi ke AWS SAM template, Anda dapat:
Kontrol versi infrastruktur Anda
Mengotomatiskan penerapan
Fungsi debug jarak jauh
Tambahkan AWS sumber daya tambahan ke aplikasi Anda
Pertahankan lingkungan yang konsisten di seluruh siklus hidup pengembangan
Gunakan Infrastructure Composer untuk mengedit template Anda AWS SAM secara visual
Untuk informasi lebih lanjut tentang penggunaan alat IAC, lihat panduan berikut:
Alat-alat ini menyediakan kemampuan tambahan untuk mendefinisikan, menguji, dan menyebarkan aplikasi tanpa server Anda.
Langkah berikutnya
Untuk mempelajari selengkapnya tentang bekerja dengan fungsi Lambda di VS Code, lihat sumber daya berikut:
-
Bekerja dengan fungsi AWS Lambda di Panduan Pengguna AWS Toolkit for VS Code
-
Bekerja dengan aplikasi tanpa server di AWS Toolkit for VS Code User Guide
-
Infrastruktur sebagai kode dalam Panduan Pengembang Lambda
