本文為英文版的機器翻譯版本,如內容有任何歧義或不一致之處,概以英文版為準。
在 中初始化叢集 AWS CloudHSM
建立叢集並在其中新增硬體安全模組 (HSM) 之後 AWS CloudHSM,您可以初始化叢集。完成下列主題中的步驟來初始化 叢集。
初始化叢集之前,請檢閱您可以用來驗證 HSM 的身分和真實性的程序。此程序為選擇性,且只能在叢集初始化前使用。將叢集初始化後,您無法使用此程序來取得您的憑證或驗證 HSM。
概觀
叢集初始化程序會透過憑證型身分驗證系統建立您對叢集和 HSMs擁有權和控制權。此程序以密碼編譯方式證明您是叢集中 HSMs的唯一擁有者,並建立 HSMs 未來所有連線所需的信任基礎。
此頁面將示範如何執行下列操作:
-
擷取叢集的憑證簽署請求 (CSR)。
-
產生並使用私有金鑰 (私有金鑰) 來建立自我簽署的根憑證或憑證鏈。
-
簽署叢集的 CSR 以產生已簽署的 HSM 憑證。
-
使用簽章的 HSM 憑證和自我簽署的憑證或憑證鏈來初始化您的叢集。
當您準備好開始時,請移至步驟 1. 取得叢集 CSR。
步驟 1. 取得叢集 CSR
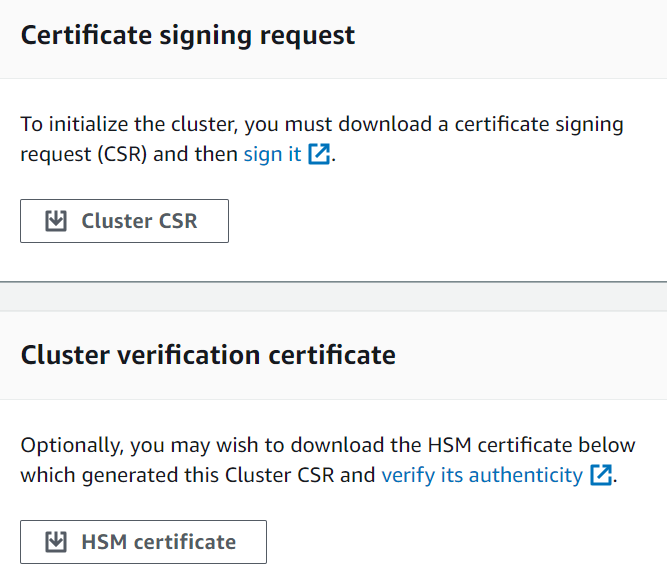
初始化叢集之前,您必須下載並簽署憑證簽署請求 (CSR),CSR 是由叢集的第一個 HSM 產生。如果您之前已依照驗證叢集的 HSM 身分中的步驟操作,則您已有 CSR,可以直接簽署。否則,請使用 AWS CloudHSM 主控台、 AWS Command Line Interface (AWS CLI) 或 AWS CloudHSM API 立即取得 CSR。
- Console
- AWS CLI
-
在命令提示字元,執行下列 describe-clusters 命令,其會擷取 CSR 並將它儲存到檔案。將 <cluster ID> 取代為先前建立的叢集 ID。
$ aws cloudhsmv2 describe-clusters --filters clusterIds=<cluster ID> \
                                   --output text \
                                   --query 'Clusters[].Certificates.ClusterCsr' \
                                   > <cluster ID>_ClusterCsr.csr
- AWS CloudHSM API
步驟 2. 為您的根 CA 建立私有金鑰
針對生產叢集,應使用信任的隨機來源以安全的方式建立您想建立的金鑰。我們建議您使用安全的離站和離線 HSM 或其他同等項目。安全地存放金鑰。金鑰會建立叢集的身分識別,以及您對叢集所包含的 HSM 的唯一控制權。
在開發和測試時,您可以使用任何方便的工具 (如 OpenSSL) 來建立和簽署叢集憑證。下列範例說明如何建立金鑰。在使用該金鑰建立自我簽署憑證 (請見以下) 後,您應該妥善存放它。若要登入 AWS CloudHSM 執行個體,憑證必須存在,但私有金鑰不會存在。
下表概述憑證產生支援的演算法、金鑰大小和曲線。
| 演算法 |
大小/曲線 |
RSA PKCSv1.5 |
2048、3072、4096
|
RSA-PSS |
2048、3072、4096
|
ECDSA |
prime256v1、secp384r1、secp521r1 |
摘要 |
SHA-224, SHA-256, SHA-384和 SHA-512
|
使用下列範例命令,為您的自我簽署根 CA 建立私有金鑰。
$ openssl genrsa -aes256 -out customerRootCA.key 2048
Generating RSA private key, 2048 bit long modulus
........+++
............+++
e is 65537 (0x10001)
Enter pass phrase for customerRootCA.key:
Verifying - Enter pass phrase for customerRootCA.key:
步驟 3。簽署 CSR
在先前的步驟中,您擷取叢集的 CSR,並為根 CA 建立私有金鑰。在此步驟中,您將使用私有金鑰產生簽署憑證,以簽署叢集的 CSR。以下主題將引導您使用 OpenSSL 建立單一自我簽署憑證或憑證鏈的程序。此步驟不需要 AWS CLI ,而且 shell 不需要與 AWS 您的帳戶建立關聯。
選擇下列其中一種方法來簽署叢集的 CSR:
選擇您的憑證方法
您必須選擇下列兩種方法之一。請勿完成這兩個方法。
- 選項 A:單一自我簽署憑證
-
建立單一自我簽署根憑證,以簽署叢集的 CSR。這是建立信任的最簡單直接方法。
建議用於:
不需要外部 PKI 的環境
測試和開發環境,其中偏好簡單性
前往: 建立單一自我簽署憑證
- 選項 B:具有中繼 CA 的憑證鏈
-
使用中繼憑證授權機構建立憑證鏈。中繼憑證鏈透過允許根憑證授權機構 (CAs) 在將憑證發行委派給中繼 CAs 的同時保持離線,從而降低損害根 CA 的風險,來提供增強的安全性、可擴展性和靈活性。
建議用於:
AWS PCA 整合範例:您可以使用 AWS 私有憑證授權機構來建立和管理中繼 CA 憑證。這可提供自動化憑證生命週期管理,包括續約和撤銷,同時保持根 CA 離線的安全優勢。如需 AWS PCA 的詳細資訊,請參閱 AWS Private Certificate Authority 使用者指南。
前往: 建立中繼憑證授權機構 (ICA) 鏈
建立單一自我簽署憑證
您用來建立生產叢集私有金鑰的信任硬體,也應該提供軟體工具來產生使用該金鑰的自我簽署憑證。下列範例使用 OpenSSL 和您在上一個步驟中建立的私有金鑰來建立自我簽署的根 CA 簽署憑證。憑證有效期限是 10 年 (3652 天)。請閱讀畫面上的指示,並依照提示操作。
$ openssl req -new -x509 -days 3652 -key customerRootCA.key -out customerRootCA.crt
Enter pass phrase for customerRootCA.key:
You are about to be asked to enter information that will be incorporated
into your certificate request.
What you are about to enter is what is called a Distinguished Name or a DN.
There are quite a few fields but you can leave some blank
For some fields there will be a default value,
If you enter '.', the field will be left blank.
-----
Country Name (2 letter code) [AU]:
State or Province Name (full name) [Some-State]:
Locality Name (eg, city) []:
Organization Name (eg, company) [Internet Widgits Pty Ltd]:
Organizational Unit Name (eg, section) []:
Common Name (e.g. server FQDN or YOUR name) []:
Email Address []:
此命令會建立名為 customerRootCA.crt 的憑證檔案。將此憑證放在您要從中連線至 AWS CloudHSM 叢集的每個主機上。如果您替檔案取了其他名稱,或將其存放在主機根目錄以外的路徑,請據此編輯您的用戶端組態檔案。使用您剛建立的憑證和私有金鑰來簽署後續步驟中的叢集憑證簽署請求 (CSR)。
使用自我簽署的根 CA 簽署叢集 CSR
您用來建立生產叢集私有金鑰的信任硬體,也應該提供工具來簽署使用該金鑰的 CSR。以下範例會使用 OpenSSL 來簽署叢集的 CSR。以下範例命令使用自我簽署簽署的 CSR customerRootCA.crt
$ openssl x509 -req -days 3652 -in <cluster ID>_ClusterCsr.csr \
		-CA <customerRootCA>.crt \
		-CAkey <customerRootCA>.key \
		-CAcreateserial \
		-out <cluster ID>_CustomerHsmCertificate.crt
Signature ok
subject=/C=US/ST=CA/O=Cavium/OU=N3FIPS/L=SanJose/CN=HSM:<HSM identifier>:PARTN:<partition number>, for FIPS mode
Getting CA Private Key
Enter pass phrase for <customerRootCA>.key:
此命令會建立名為 <cluster ID>_CustomerHsmCertificate.crt
根據根 CA 驗證已簽署的憑證 (選用):
$ openssl verify -purpose sslserver -CAfile customerRootCA.crt <cluster ID>_CustomerHsmCertificate.crt
<cluster ID>_CustomerHsmCertificate.crt: OK
使用自我簽署的根 CA 產生已簽署的 HSM 憑證後,請前往 步驟 4. 初始化叢集。
建立中繼憑證授權機構 (ICA) 鏈
下列範例將逐步引導您建立長度為 2 的憑證鏈,其中包含根憑證授權機構 (CA) 和中繼 CA。您必須先建立自我簽署的根 CA 憑證,然後產生由根 CA 簽署的中繼 CA。最後,您將使用中繼 CA 簽署叢集的 CSR,從 HSM 憑證建立完整的信任鏈,再回到根 CA。此方法透過在將中繼 CA day-to-day憑證操作時保持根 CA 離線,提供增強的安全性。
若要使用憑證鏈初始化叢集,您的鏈必須符合下列要求:
必須排序鏈,從簽署叢集 CSR 的中繼 CA 開始。依此順序,第一個 ICA 應該有一個符合鏈結中下一個 ICA 主體的發行者,以此類推。
只有根 CA 應該自我簽署,這表示其發行者和主體應該是相同的。
鏈必須包含不超過 4 個憑證 (包括結尾的根 CA),且鏈的總大小不得超過 16 kb (KB)。
所有憑證授權機構 CAs) 都應該符合 RFC 5280 準則。
本節提供使用兩種不同方法來建立中繼憑證授權機構鏈結的範例:用於產生本機憑證的 OpenSSL,以及用於受管憑證服務的 AWS 私有憑證授權機構 (PCA)。選擇最適合您環境和安全需求的方法。
下列範例是一般使用案例,並使用最基本的組態進行簡化。對於生產環境,請檢閱您的使用案例特有的其他組態選項和安全性需求。
- OpenSSL
-
使用 CA 的常見 v3 副檔名建立 OpenSSL 組態檔案:
$ cat > ca-extensions.conf <<EOF
[req]
distinguished_name = req_distinguished_name
[req_distinguished_name]
C = Country Name (2 letter code)
ST = State or Province Name (full name)
L = Locality Name (eg, city)
O = Organization Name (eg, company)
OU = Organizational Unit Name (eg, section)
CN = Common Name (e.g. server FQDN or YOUR name)
[v3_ca]
subjectKeyIdentifier = hash
authorityKeyIdentifier = keyid:always,issuer
basicConstraints = critical,CA:true
keyUsage = critical, keyCertSign, cRLSign, digitalSignature
EOF
使用 OpenSSL 產生自我簽署的根 CA:
$ openssl req -new -x509 -days 3652 -key customerRootCA.key -out customerRootCA.crt -extensions v3_ca -config ca-extensions.conf
Enter pass phrase for customerRootCA.key:
You are about to be asked to enter information that will be incorporated
into your certificate request.
What you are about to enter is what is called a Distinguished Name or a DN.
There are quite a few fields but you can leave some blank
For some fields there will be a default value,
If you enter '.', the field will be left blank.
-----
Country Name (2 letter code) [AU]:
State or Province Name (full name) [Some-State]:
Locality Name (eg, city) []:
Organization Name (eg, company) [Internet Widgits Pty Ltd]:
Organizational Unit Name (eg, section) []:
Common Name (e.g. server FQDN or YOUR name) []:
Email Address []:
產生中繼 CA 金鑰:
$ openssl genrsa -aes256 -out intermediateCA.key 2048
Generating RSA private key, 2048 bit long modulus
........+++
............+++
e is 65537 (0x10001)
Enter pass phrase for intermediateCA.key:
Verifying - Enter pass phrase for intermediateCA.key:
建立中繼 CA 憑證簽署請求 (CSR):
$ openssl req -new -key intermediateCA.key -out intermediateCA.csr
Enter pass phrase for intermediateCA.key:
You are about to be asked to enter information that will be incorporated
into your certificate request.
What you are about to enter is what is called a Distinguished Name or a DN.
There are quite a few fields but you can leave some blank
For some fields there will be a default value,
If you enter '.', the field will be left blank.
-----
Country Name (2 letter code) [AU]:
State or Province Name (full name) [Some-State]:
Locality Name (eg, city) []:
Organization Name (eg, company) [Internet Widgits Pty Ltd]:
Organizational Unit Name (eg, section) []:
Common Name (e.g. server FQDN or YOUR name) []:
Email Address []:
使用自我簽署的根 CA,建立中繼 CA 憑證:
$ openssl x509 -req -in intermediateCA.csr \
		-CA customerRootCA.crt \
		-CAkey customerRootCA.key \
		-CAcreateserial \
		-days 3652 \
		-extensions v3_ca \
		-extfile ca-extensions.conf \
		-out intermediateCA.crt

Certificate request self-signature ok
subject=C= , ST= , L= , O= , OU=
將憑證合併為鏈結檔案:
$ cat intermediateCA.crt customerRootCA.crt > chainCA.crt

-----BEGIN CERTIFICATE-----
[Intermediate CA]
-----END CERTIFICATE-----
...
...
-----BEGIN CERTIFICATE-----
[Root CA]
-----END CERTIFICATE-----
使用中繼 CA 簽署叢集 CSR:
$ openssl x509 -req -days 3652 -in <cluster ID>_ClusterCsr.csr \
			-CA intermediateCA.crt \
			-CAkey intermediateCA.key \
			-CAcreateserial \
			-out <cluster ID>_CustomerHsmCertificate.crt
Signature ok
subject=/C=US/ST=CA/O=Cavium/OU=N3FIPS/L=SanJose/CN=HSM:<HSM identifier>:PARTN:<partition number>, for FIPS mode
Getting CA Private Key
Enter pass phrase for intermediateCA.key:
- AWS PCA
-
使用 AWS Private Certificate Authority 建立和啟用根 CA:
$ # 1. Create Root CA
aws acm-pca create-certificate-authority \
    --certificate-authority-configuration \
        "KeyAlgorithm=RSA_4096,
        SigningAlgorithm=SHA256WITHRSA,
        Subject={Country=US,Organization=MyOrg,OrganizationalUnit=IT,CommonName=RootCA}" \
    --certificate-authority-type ROOT

# Store the Root CA Authority ARN from the previous output
ROOT_CA_AUTHORITY_ARN="arn:aws:acm-pca:<region>:<account-id>:certificate-authority/<ca-authority-id>"

# 2. Generate Root CA CSR
aws acm-pca get-certificate-authority-csr \
    --certificate-authority-arn $ROOT_CA_AUTHORITY_ARN \
    --output text > customerRootCA.csr

# 3. Self-sign Root CA Certificate
aws acm-pca issue-certificate \
    --certificate-authority-arn $ROOT_CA_AUTHORITY_ARN \
    --csr fileb://customerRootCA.csr \
    --signing-algorithm SHA256WITHRSA \
	--template-arn arn:aws:acm-pca:::template/RootCACertificate/V1 \
    --validity Value=3652,Type=DAYS

# Store the Root CA certificate ARN from the previous output
ROOT_CA_ARN="arn:aws:acm-pca:<region>:<account-id>:certificate-authority/<ca-authority-id>/certificate/<cert-id>"

# 4. Retrieve the Root CA certificate
aws acm-pca get-certificate \
    --certificate-authority-arn $ROOT_CA_AUTHORITY_ARN \
    --certificate-arn $ROOT_CA_ARN \
    --output text > customerRootCA.crt

# 5. Import the Root CA Certificate
aws acm-pca import-certificate-authority-certificate \
    --certificate-authority-arn $ROOT_CA_AUTHORITY_ARN \
    --certificate fileb://customerRootCA.crt
建立和啟用次級 CA (也稱為中繼 CA):
$ # 6. Create Subordinate CA
aws acm-pca create-certificate-authority \
    --certificate-authority-configuration \
        "KeyAlgorithm=RSA_4096,
        SigningAlgorithm=SHA256WITHRSA,
        Subject={Country=US,Organization=MyOrg,OrganizationalUnit=IT,CommonName=SubordinateCA}" \
    --certificate-authority-type SUBORDINATE

# Store the Subordinate CA Authority ARN from the previous output
SUB_CA_AUTHORITY_ARN="arn:aws:acm-pca:<region>:<account-id>:certificate-authority/<sub-ca-authority-id>"

# 7. Generate Subordinate CA CSR
aws acm-pca get-certificate-authority-csr \
    --certificate-authority-arn $SUB_CA_AUTHORITY_ARN \
    --output text > intermediateCA.csr

# 8. Issue Subordinate CA Certificate using Root CA
aws acm-pca issue-certificate \
    --certificate-authority-arn $ROOT_CA_AUTHORITY_ARN \
    --csr fileb://intermediateCA.csr \
    --signing-algorithm SHA256WITHRSA \
    --template-arn arn:aws:acm-pca:::template/SubordinateCACertificate_PathLen0/V1 \
    --validity Value=3651,Type=DAYS

# Store the Subordinate CA certificate ARN from the previous output
SUB_CA_ARN="arn:aws:acm-pca:<region>:<account-id>:certificate-authority/<sub-ca-authority-id>"

# 9. Retrieve Subordinate CA Certificate
aws acm-pca get-certificate \
    --certificate-authority-arn $ROOT_CA_AUTHORITY_ARN \
    --certificate-arn $SUB_CA_ARN \
    --query 'Certificate' \
    --output text > intermediateCA.crt

# 10. Import the Subordinate CA Certificate
aws acm-pca import-certificate-authority-certificate \
    --certificate-authority-arn $SUB_CA_AUTHORITY_ARN \
    --certificate fileb://intermediateCA.crt \
    --certificate-chain fileb://customerRootCA.crt
將憑證合併為鏈結檔案:
$ cat intermediateCA.crt customerRootCA.crt > chainCA.crt

-----BEGIN CERTIFICATE-----
[Intermediate CA]
-----END CERTIFICATE-----
...
...
-----BEGIN CERTIFICATE-----
[Root CA]
-----END CERTIFICATE-----
使用 AWS PCA 簽署叢集 CSR:
$ aws acm-pca issue-certificate \
    --certificate-authority-arn $SUB_CA_AUTHORITY_ARN \
    --csr fileb://<cluster ID>_ClusterCsr.csr \
    --signing-algorithm SHA256WITHRSA \
    --template-arn arn:aws:acm-pca:::template/EndEntityCertificate/V1 \
    --validity Value=3650,Type=DAYS

# Store your cluster's cert ARN from the previous output
CLUSTER_CERT_ARN="arn:aws:acm-pca:<region>:<account-id>:certificate-authority/<cluster-cert-arn>"
下載簽章的叢集憑證:
$ aws acm-pca get-certificate \
    --certificate-authority-arn $SUB_CA_AUTHORITY_ARN \
    --certificate-arn $CLUSTER_CERT_ARN \
    --output text --query Certificate > <cluster ID>_CustomerHsmCertificate.crt
此命令會建立名為 <cluster ID>_CustomerHsmCertificate.crt
根據憑證鏈驗證簽章的憑證 (選用):
$ openssl verify -purpose sslserver -CAfile chainCA.crt <cluster ID>_CustomerHsmCertificate.crt
<cluster ID>_CustomerHsmCertificate.crt: OK
使用中繼 CA 產生已簽署的 HSM 憑證後,請前往 步驟 4. 初始化叢集。
步驟 4. 初始化叢集
使用已簽署的 HSM 憑證和簽署憑證來初始化您的叢集。您可以使用 AWS CloudHSM 主控台AWS CLI、 或 AWS CloudHSM API。
- Console
初始化叢集 (主控台)
在 https://https://console.aws.amazon.com/cloudhsm/home 開啟 AWS CloudHSM 主控台。
-
選取您要驗證的 HSM 叢集 ID 旁的選項按鈕。
-
選取動作。從下拉式功能表中,選擇初始化。
-
如果您未完成上一個步驟來建立 HSM,請為您正在建立的 HSM 選擇一個可用區域 (AZ)。然後選取建立。
-
在 Download certificate signing request (下載憑證簽署請求) 頁面上,選擇 Next (下一步)。如果無法使用 Next (下一步),先選擇其中一個 CSR 或憑證連結。然後選擇下一步。
-
在 Sign certificate signing request (簽署憑證簽署請求) 頁面上,選擇 Next (下一步)。
-
在 Upload the certificates (上傳憑證) 頁面上,執行下列動作:
-
選擇 Cluster certificate (叢集憑證) 旁的 Upload file (上傳檔案)。然後,尋找並選取您之前簽署的 HSM 憑證。如果您已完成先前區段的步驟,請選取 <cluster
ID>_CustomerHsmCertificate.crt
-
選擇 Issuing certificate (發行憑證) 旁的 Upload file (上傳檔案)。然後,根據您選擇的方法選取簽署憑證:
-
選擇 Upload and initialize (上傳並初始化)。
- AWS CLI
-
在命令提示中,執行 initialize-cluster 命令。提供下列資訊:
$ aws cloudhsmv2 initialize-cluster --cluster-id <cluster ID> \
                                    --signed-cert file://<cluster ID>_CustomerHsmCertificate.crt \
                                    --trust-anchor file://<customerRootCA.crt OR chainCA.crt>
{
    "State": "INITIALIZE_IN_PROGRESS",
    "StateMessage": "Cluster is initializing. State will change to INITIALIZED upon completion."
}
- AWS CloudHSM API