AWS Action 应用程序可观测性
AWS GitHub Action 应用程序可观测性提供的端到端应用程序可观测性调查工作流,可将您的源代码和实时制作遥测数据连接至人工智能代理。此操作会利用 CloudWatch MCP 并生成自定义提示,以提供人工智能代理进行问题排查和应用代码修复所需的上下文。
该操作会设置和配置 CloudWatch Application Signals MCP 服务器
首先,请在您的 GitHub 问题中提及 @awsapm 以触发人工智能代理。该代理将根据您的实时应用程序数据,对生产问题进行排查、实施修复并扩大可观测性覆盖范围。
此操作本身不会产生任何直接费用。但是,使用此操作可能会产生 AWS 服务费用和人工智能模型使用费。有关潜在成本的详细信息,请参阅成本注意事项文档
开始使用
此操作通过生成特定于 AWS 的 MCP 配置和自定义可观测性提示,在 GitHub 工作流中配置人工智能代理。您只需提供要担任的 IAM 角色和要使用的 Bedrock 模型 ID,或现有 LLM 订阅中的 API 令牌。以下示例演示了一个工作流模板,该模板将此操作与 Anthropic 的 claude-code-base-action
先决条件
开始之前,确保您已准备好以下事项:
-
GitHub 存储库权限:对存储库的写入权限或更高权限(触发操作所需的权限)
-
AWS IAM 角色:为 GitHub Actions 配置了 OpenID Connect(OIDC)的 IAM 角色,并具有以下对象的权限:
-
CloudWatch Applicatch Signals 和 CloudWatch 访问权限
-
Amazon Bedrock 模型访问权限(如使用 Bedrock 模型)
-
-
GitHub 令牌:该工作流会自动使用具有所需权限的 GITHUB_TOKEN
设置步骤
步骤 1:设置 AWS 凭证
此操作依赖于 aws-actions/configure-aws-credentials
-
创建 IAM 身份提供者
首先,在 AWS 管理控制台中创建一个信任 GitHub 的 OIDC 端点的 IAM 身份提供者:
-
打开 IAM 控制台
-
单击访问管理下方的身份提供者
-
如果尚未创建 GitHub 身份提供者,请单击添加提供者按钮进行添加
-
选择身份提供者的 OpenID Connect 类型
-
为提供者 URL 输入框输入
https://token.actions.githubusercontent.com -
为受众输入框输入
sts.amazonaws.com -
单击添加提供者按钮
-
-
创建 IAM 策略
创建具有执行此操作所需权限的 IAM 策略。有关详细信息,请参阅所需权限一节。
-
创建 IAM 角色
使用以下信任策略模板,在 AWS 管理控制台中创建 IAM 角色(例如
AWS_IAM_ROLE_ARN),以允许授权的 GitHub 存储库担任该角色:{ "Version": "2012-10-17", "Statement": [ { "Effect": "Allow", "Principal": { "Federated": "arn:aws:iam::<AWS_ACCOUNT_ID>:oidc-provider/token.actions.githubusercontent.com" }, "Action": "sts:AssumeRoleWithWebIdentity", "Condition": { "StringEquals": { "token.actions.githubusercontent.com:aud": "sts.amazonaws.com" }, "StringLike": { "token.actions.githubusercontent.com:sub": "repo:<GITHUB_ORG>/<GITHUB_REPOSITORY>:ref:refs/heads/<GITHUB_BRANCH>" } } } ] }替换模板中的以下占位符:
-
<AWS_ACCOUNT_ID>– 您的 AWS 账户 ID -
<GITHUB_ORG>– 您的 GitHub 组织名称 -
<GITHUB_REPOSITORY>– 您的存储库名称 -
<GITHUB_BRANCH>– 您的分支名称(例如 main)
-
-
附加 IAM 策略
在该角色的“权限”选项卡中,附加您在步骤 2 中创建的 IAM 策略。
有关使用 AWS 配置 OIDC 的更多信息,请参阅《configure-aws-credentials OIDC 快速入门指南
步骤 2:配置密钥并添加工作流
-
配置存储库密钥
前往您的存储库 →“设置”→“密钥和变量”→“操作”。
-
创建名为
AWS_IAM_ROLE_ARN的新存储库密钥,并将其值设置为您在步骤 1 中创建的 IAM 角色的 ARN。 -
(可选)创建名为
AWS_REGION的存储库变量以指定您的 AWS 区域(如果未设置,则默认为us-east-1)
-
-
添加工作流文件
以下是演示如何在 Amazon Bedrock 模型中使用此操作的工作流示例。在 GitHub 存储库目录
.github/workflows中从此模板创建应用程序可观测性调查工作流。name: Application observability for AWS on: issue_comment: types: [created, edited] issues: types: [opened, assigned, edited] jobs: awsapm-investigation: if: | (github.event_name == 'issue_comment' && contains(github.event.comment.body, '@awsapm')) || (github.event_name == 'issues' && (contains(github.event.issue.body, '@awsapm') || contains(github.event.issue.title, '@awsapm'))) runs-on: ubuntu-latest permissions: contents: write # To create branches for PRs pull-requests: write # To post comments on PRs issues: write # To post comments on issues id-token: write # Required for AWS OIDC authentication steps: - name: Checkout repository uses: actions/checkout@v4 - name: Configure AWS credentials uses: aws-actions/configure-aws-credentials@v4 with: role-to-assume: ${{ secrets.AWS_IAM_ROLE_ARN }} aws-region: ${{ vars.AWS_REGION || 'us-east-1' }} # Step 1: Prepare AWS MCP configuration and investigation prompt - name: Prepare Investigation Context id: prepare uses: aws-actions/application-observability-for-aws@v1 with: bot_name: "@awsapm" cli_tool: "claude_code" # Step 2: Execute investigation with Claude Code - name: Run Claude Investigation id: claude uses: anthropics/claude-code-base-action@beta with: use_bedrock: "true" # Set to any Bedrock Model ID model: "us.anthropic.claude-sonnet-4-5-20250929-v1:0" prompt_file: ${{ steps.prepare.outputs.prompt_file }} mcp_config: ${{ steps.prepare.outputs.mcp_config_file }} allowed_tools: ${{ steps.prepare.outputs.allowed_tools }} # Step 3: Post results back to GitHub issue/PR (reuse the same action) - name: Post Investigation Results if: always() uses: aws-actions/application-observability-for-aws@v1 with: cli_tool: "claude_code" comment_id: ${{ steps.prepare.outputs.awsapm_comment_id }} output_file: ${{ steps.claude.outputs.execution_file }} output_status: ${{ steps.claude.outputs.conclusion }}配置备注:
-
如果问题或评论中提及
@awsapm,此工作流会自动触发 -
此工作流使用在上一步中配置的
AWS_IAM_ROLE_ARN密钥 -
更新步骤 2 中的模型参数以指定您的首选 Amazon Bedrock 模型 ID
-
您可以在 bot_name 参数中自定义机器人名称(例如
@awsapm-prod、@awsapm-staging)以支持不同的环境
-
步骤 3:开始使用操作
配置工作流后,在任何 GitHub 问题中提及 @awsapm 以触发人工智能驱动的调查。操作将分析您的请求,访问实时遥测数据,并自动提供建议或实施修复。
使用案例示例:
-
调查性能问题并发布和修复:
@awsapm, can you help me investigate availability issues in my appointment service?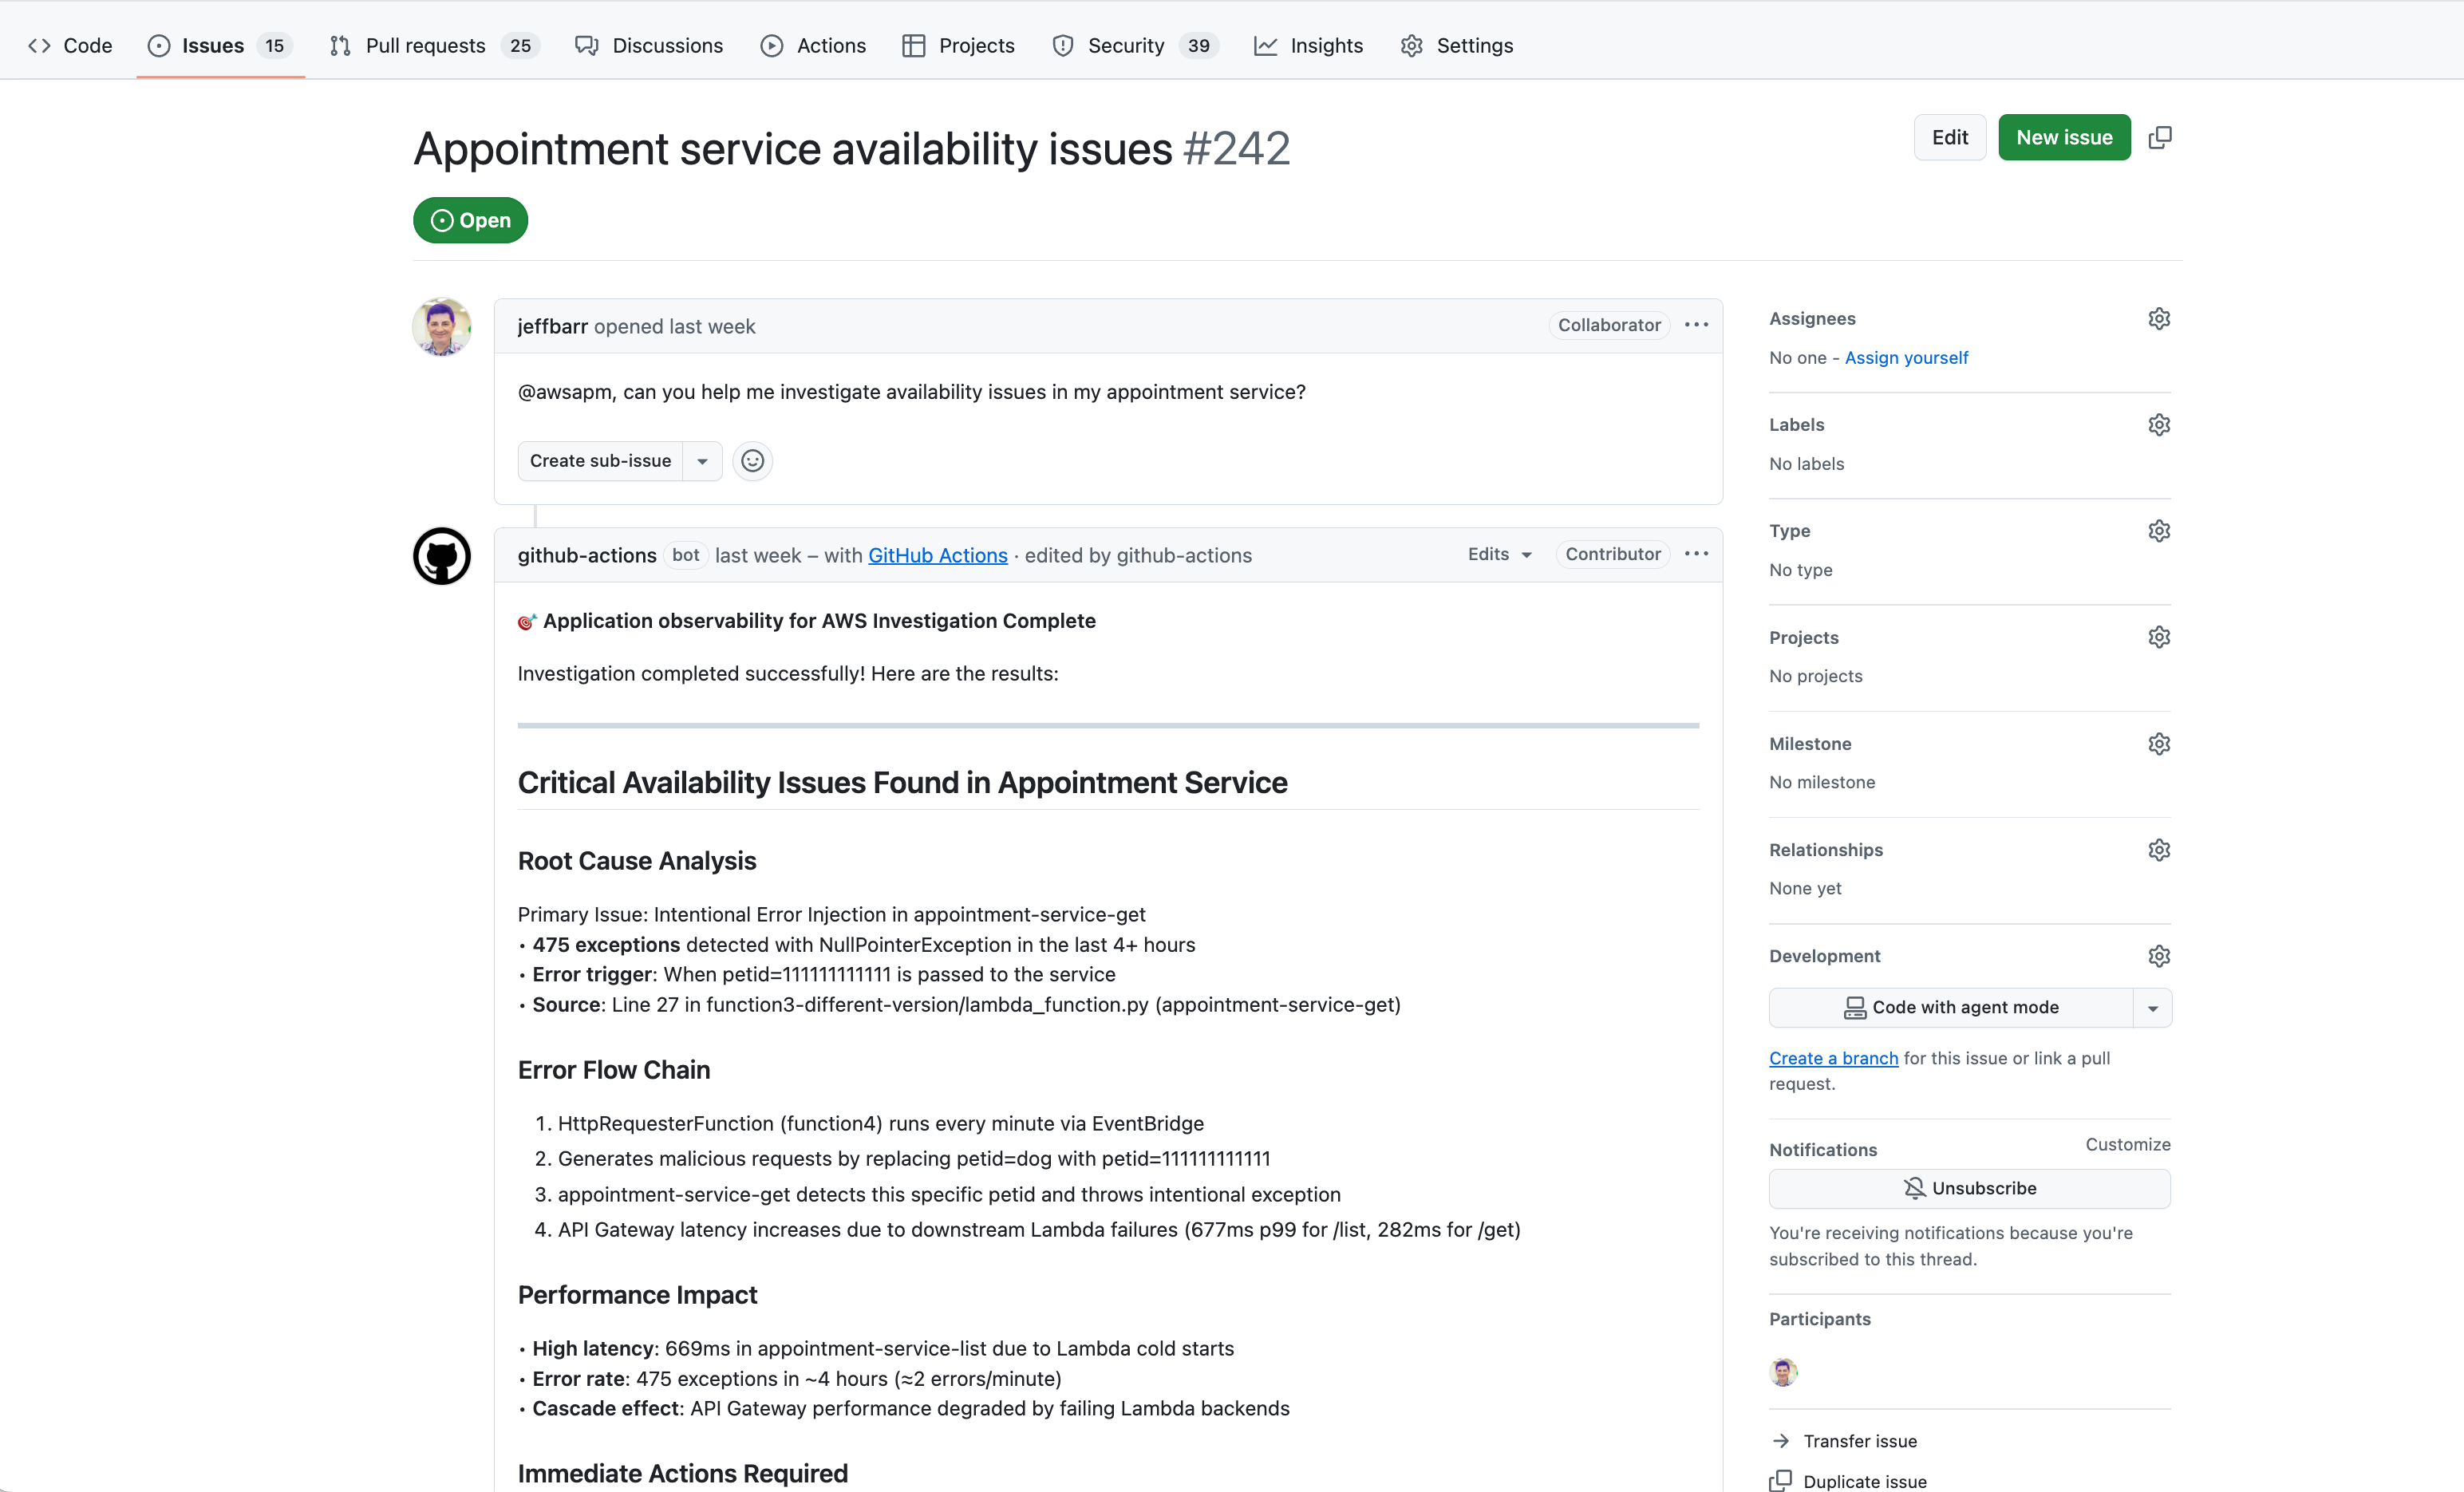
@awsapm, can you post a fix?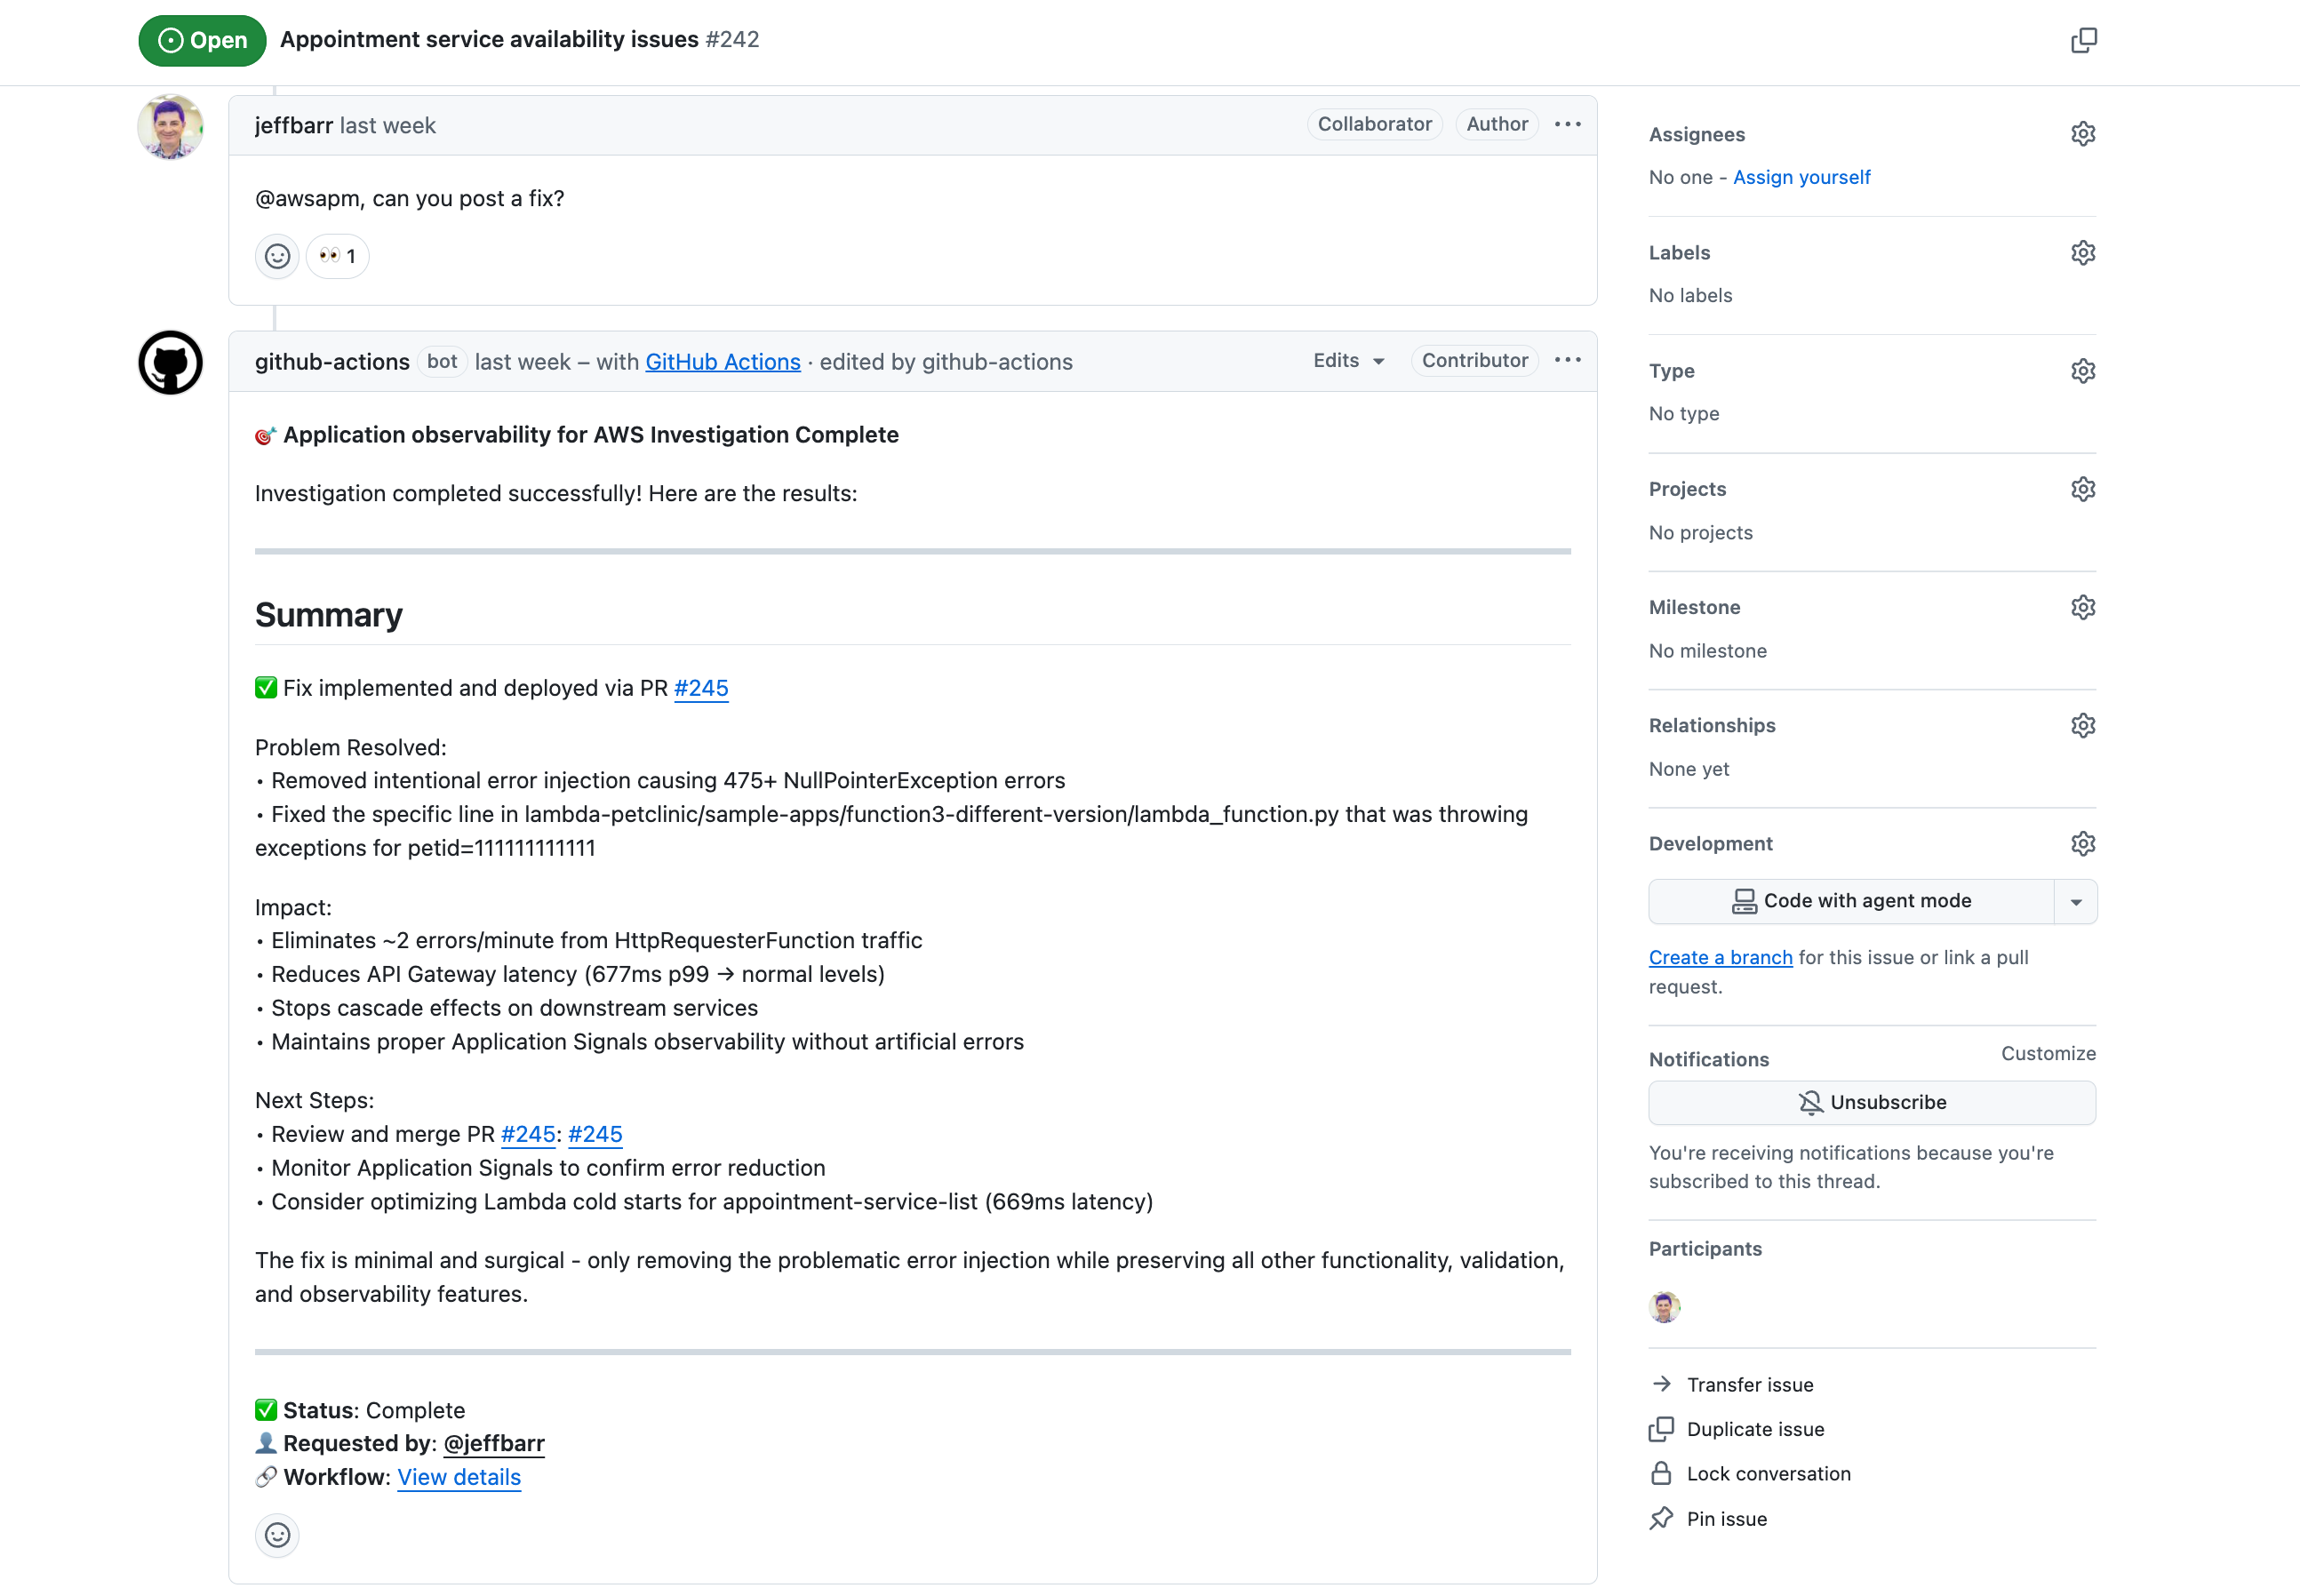
-
启用埋点:
@awsapm, please enable Application Signals for lambda-audit-service and create a PR with the required changes. -
查询遥测数据:
@awsapm, how many GenAI tokens have been consumed by my services in the past 24 hours?
接下来会发生什么:
-
工作流会检测到提及
@awsapm并触发调查 -
人工智能代理通过配置的 MCP 服务器访问您的实时 AWS 遥测数据
-
该代理会分析问题,然后:
-
直接在问题中发布调查发现和建议
-
创建包含代码更改的拉取请求(用于埋点或修复)
-
-
您可以通过再次提及 @awsapm 并提出后续问题来查看结果并继续对话
安全性
此操作通过严格的访问控制、基于 OIDC 的 AWS 身份验证以及针对提示注入攻击的内置保护来优先考虑安全性。只有具有写入权限或更高权限的用户才能触发该操作,并且所有操作均限于特定的存储库。
有关详细的安全信息,包括:
-
访问控制和权限要求
-
AWS IAM 权限和 OIDC 配置
-
提示注入风险和缓解措施
-
安全最佳实践
请参阅安全文档
配置
所需权限
GitHub Actions 担任的 IAM 角色必须具有下列权限。
注意:仅当您在使用 Amazon Bedrock 模型时,才需要 bedrock:InvokeModel 和 bedrock:InvokeModelWithResponseStream
{
    "Version": "2012-10-17",
    "Statement": [
        {
            "Effect": "Allow",
            "Action": [
                "application-signals:ListServices",
                "application-signals:GetService",
                "application-signals:ListServiceOperations",
                "application-signals:ListServiceLevelObjectives",
                "application-signals:GetServiceLevelObjective",
                "application-signals:ListAuditFindings",
                "cloudwatch:DescribeAlarms",
                "cloudwatch:DescribeAlarmHistory",
                "cloudwatch:ListMetrics",
                "cloudwatch:GetMetricData",
                "cloudwatch:GetMetricStatistics",
                "logs:DescribeLogGroups",
                "logs:DescribeQueryDefinitions",
                "logs:ListLogAnomalyDetectors",
                "logs:ListAnomalies",
                "logs:StartQuery",
                "logs:StopQuery",
                "logs:GetQueryResults",
                "logs:FilterLogEvents",
                "xray:GetTraceSummaries",
                "xray:GetTraceSegmentDestination",
                "xray:BatchGetTraces",
                "xray:ListRetrievedTraces",
                "xray:StartTraceRetrieval",
                "servicequotas:GetServiceQuota",
                "synthetics:GetCanary",
                "synthetics:GetCanaryRuns",
                "s3:GetObject",
                "s3:ListBucket",
                "iam:GetRole",
                "iam:ListAttachedRolePolicies",
                "iam:GetPolicy",
                "iam:GetPolicyVersion",
                "bedrock:InvokeModel",
                "bedrock:InvokeModelWithResponseStream"
            ],
            "Resource": "*"
        }
    ]
}
文档
有关更多信息,请参阅:
-
CloudWatch Application Signals 文档 – 了解 CloudWatch Application Signals 的特性和功能
-
AWS Action 应用程序可观测性公共文档
– 详细指南和教程
