Enable fully automated remediations
The other mode of operation for the solution is to automatically remediate findings as they arrive in Security Hub.
Important
Before enabling fully automated remediations, confirm the solution is configured in the accounts and Regions where you want the solution to make automated changes. To narrow the scope of the solution’s automated remediations, see filtering fully automated remediations.
Note
Findings that are suppressed in AWS Security Hub are not automatically remediated, even when fully automated remediation is enabled for the corresponding control. A finding is suppressed when its workflow status is SUPPRESSED. The solution skips suppressed findings during automatic initiation, so suppressing a finding in Security Hub is an effective way to exclude specific findings from automated remediation while leaving the control enabled. Suppressed findings can still be remediated on demand from the Web UI or the AWS Security Hub CSPM custom action.
Automatic remediation retry limit
When a fully automated remediation fails, AWS Security Hub re-imports the still-failing finding, which would otherwise cause the solution to trigger the remediation again indefinitely. To prevent this, the solution retries a failed finding a maximum of 3 times, waiting at least 15 minutes between attempts. After the third attempt, the solution stops automatically retrying that finding and emits the RemediationRetryCapReached Amazon CloudWatch metric. The finding remains visible in the solution and can still be remediated on demand from the Web UI or the AWS Security Hub CSPM custom action. This limit applies per finding and does not affect other findings or controls.
Example: Enable fully automated remediations for Lambda.1
Enabling automatic remediations will initiate remediations on all resources matching the control you enable (Lambda.1).
Important
Confirm that you want all public Lambda Functions within the scope of the solution to have this permission revoked. Fully automated remediations will not be limited in scope to the Function you created. The solution will remediate this control if it is detected in any of the accounts and Regions in which it is installed.
| Account | Purpose | Action in us-east-1 | Action in us-west-2 |
|---|---|---|---|
|
|
Admin |
Confirm no desired public Functions |
Confirm no desired public Functions |
|
|
Member |
Confirm no desired public Functions |
Confirm no desired public Functions |
Locate the Remediation Configuration DynamoDB Table
In the Admin account, view the Outputs for the Admin stack in the CloudFormation consoleRemediationConfigurationDynamoDBTable.
This is the name of the Remediation Configuration DynamoDB table, which controls automated remediation configurations for the solution. Copy the value of this output and locate the corresponding DynamoDB table in the DynamoDB console
v2 to v4 migration
If you upgraded from v2.x to v4.0.0 or later, the solution automatically populates this table with the controls that had auto-remediation enabled in v2. Items written by the migration have modifiedBy set to v2-migration, so you can distinguish migrated entries from manual edits. To verify that the migration succeeded for the controls you expect, query the table with automatedRemediationEnabled = true and review the result. Any controls the migration skipped (CIS rules without an ASR remediation in v2, or controls v3+ does not ship) need to be enabled manually using the steps below. Refer to Update the solution for details on the migration outcome.
| Account | Purpose | Action in us-east-1 | Action in us-west-2 |
|---|---|---|---|
|
|
Admin |
Locate the Remediation Configuration DynamoDB table. |
None |
|
|
Member |
None |
None |
Modify the Remediation Configuration Table
In the DynamoDB console
Each item in the table corresponds to a Security Hub control supported by the solution. Each item has a automatedRemediationEnabled attribute that can be modified to enable fully automated remediations for the associated control.
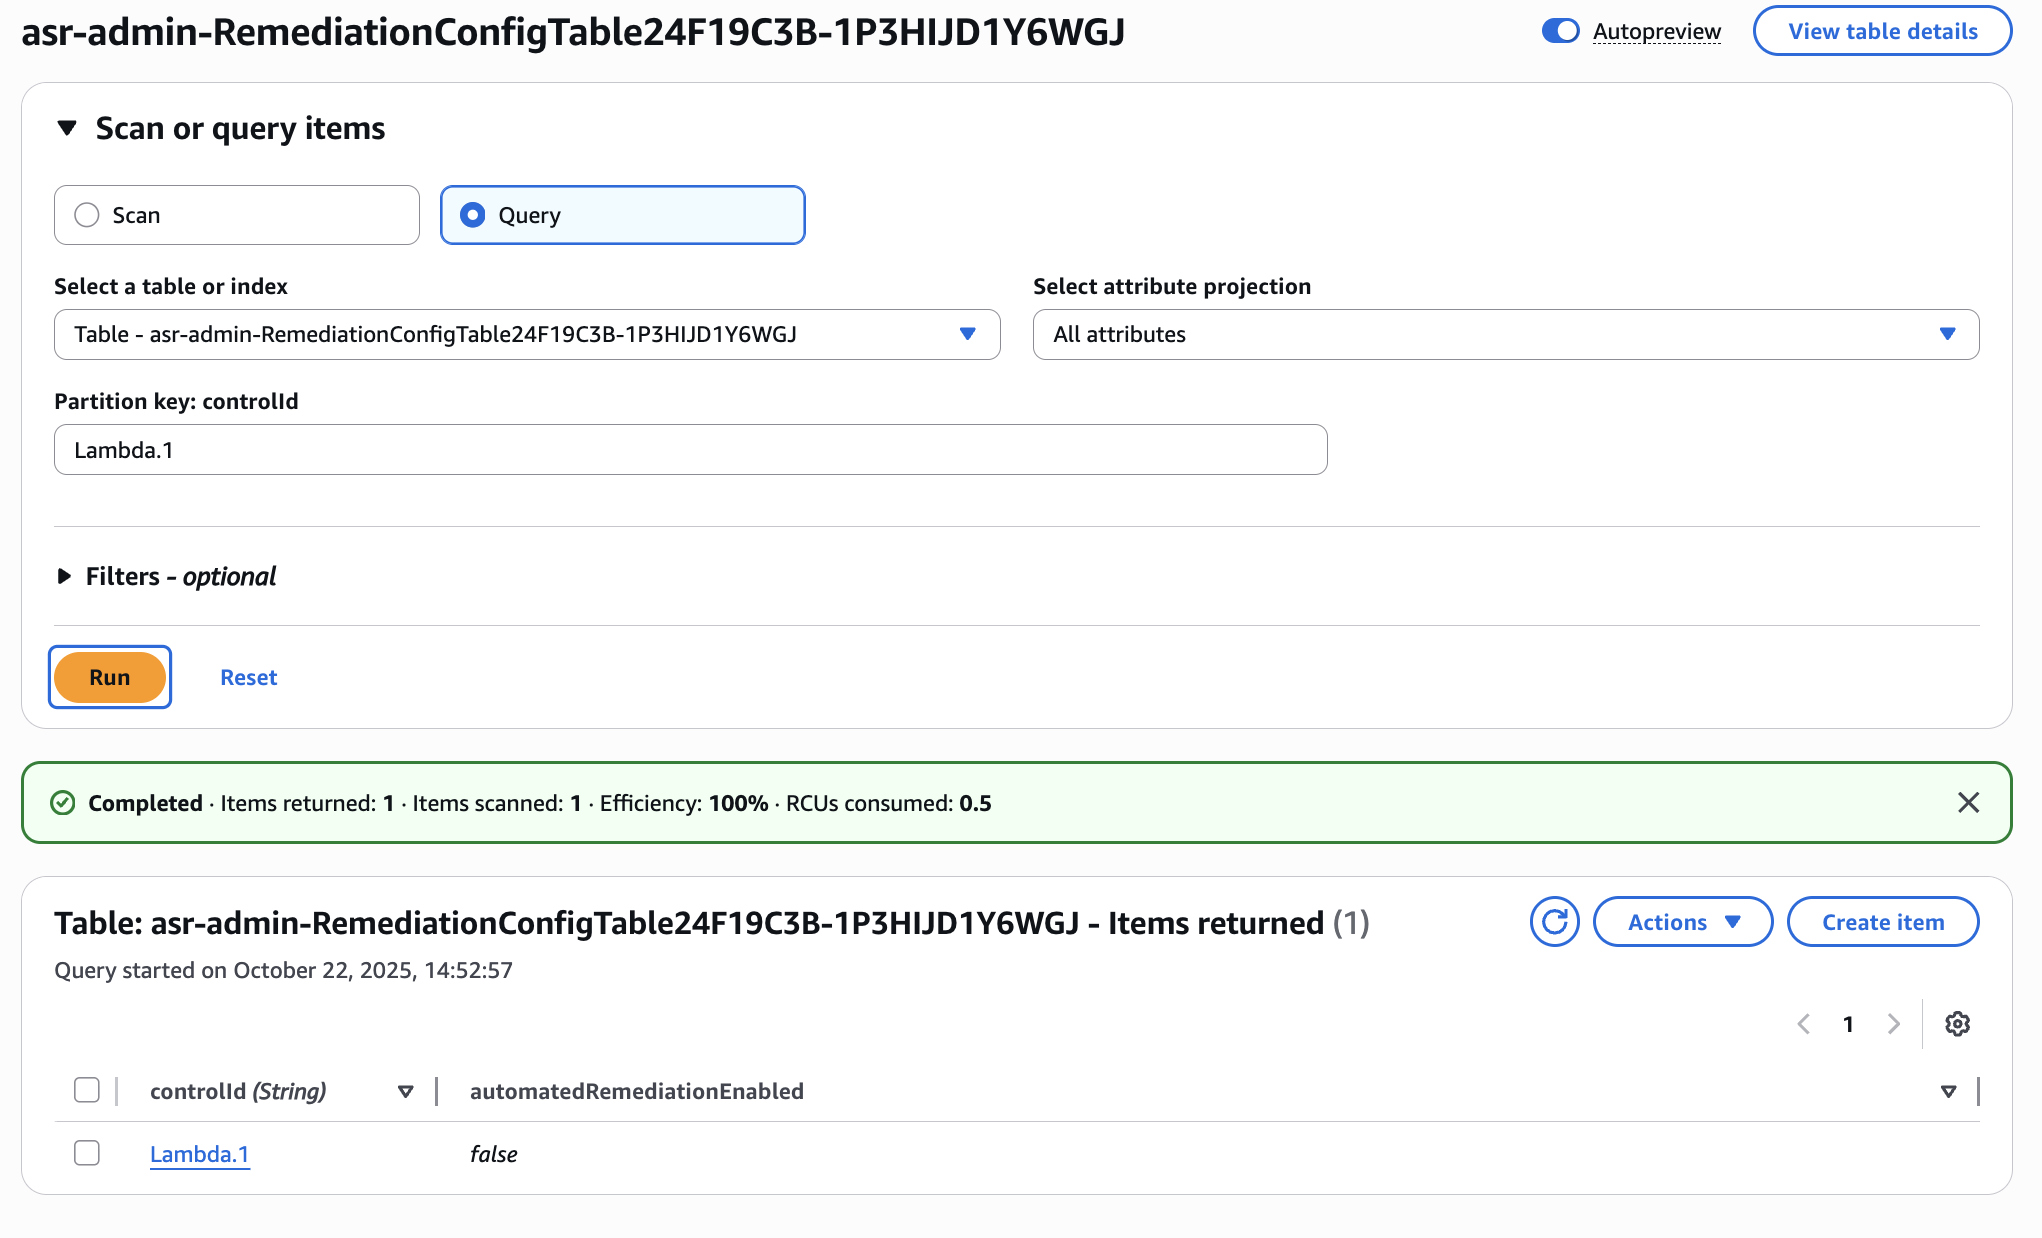
To enable Lambda.1, under Scan or query items choose Query. Under Partition key: controlId enter Lambda.1 and choose Run. You will see a single item returned corresponding to the Lambda.1 control.
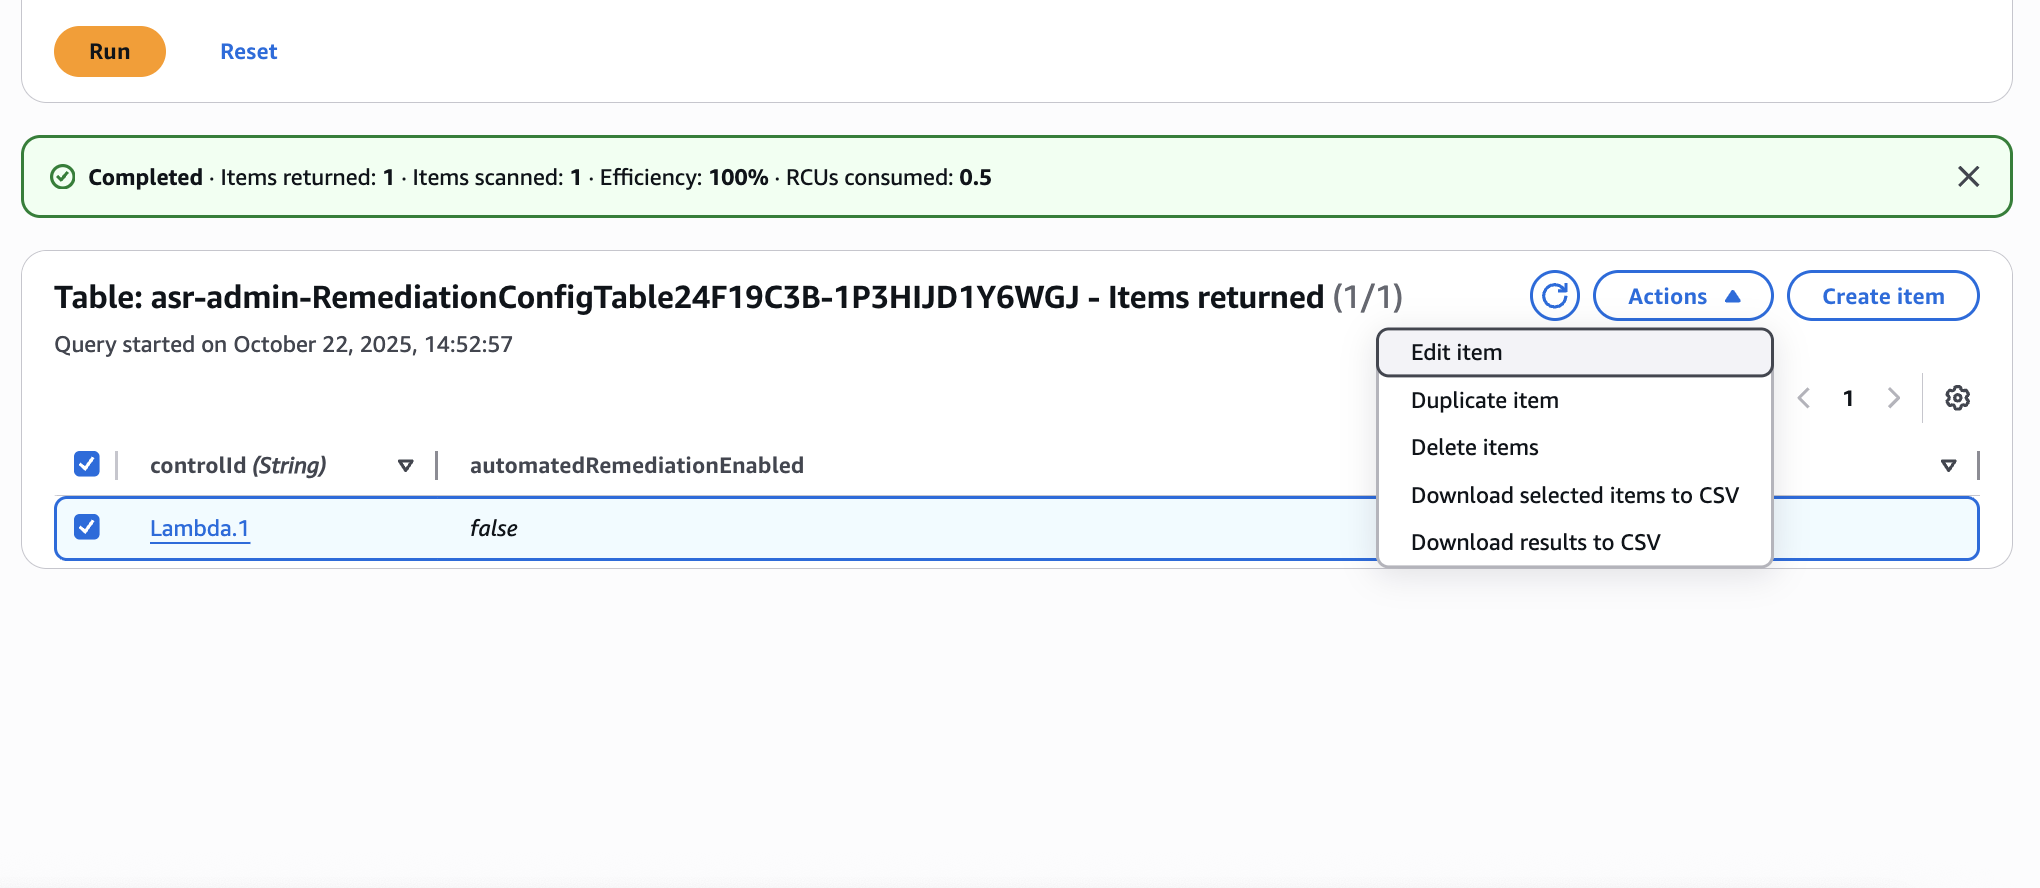
Now, select the Lambda.1 item then choose Actions > Edit item.
Finally, change the automatedRemediationEnabled attribute value to True. Choose Save and Close.
| Account | Purpose | Action in us-east-1 | Action in us-west-2 |
|---|---|---|---|
|
|
Admin |
Modify the Remediation Configuration DynamoDB table. |
None |
|
|
Member |
None |
None |
Configure the resource
In the member account, re-configure the Lambda Function to allow public access.
| Account | Purpose | Action in us-east-1 | Action in us-west-2 |
|---|---|---|---|
|
|
Admin |
None |
None |
|
|
Member |
None |
Configure the Lambda Function to allow public access |
Confirm that the remediation resolved the finding
It might take some time for Config to detect the insecure configuration again. You should receive two SNS notifications. The first will indicate that a remediation has been initiated. The second will indicate that the remediation succeeded. After receiving the second notification, navigate to the Lambda console
| Account | Purpose | Action in us-east-1 | Action in us-west-2 |
|---|---|---|---|
|
|
Admin |
None |
None |
|
|
Member |
None |
Confirm that the remediation succeeded |
(Optional) Filter fully automated remediations
To limit the scope in which the solution runs fully automated remediations, apply resource filters. Filters apply only to fully automated remediations and do not affect manually initiated remediations.
A resource filter is a reusable definition that scopes which findings are automatically remediated. Each filter can combine account IDs, AWS Organizations organizational units (OUs), resource ARN patterns, and resource tags. You create filters on the Filters page of the Web UI, then apply them to a single control from the Controls page (or to every control at once) using either Include or Exclude mode.
For the full walkthrough, including creating filters, applying them to controls, and how the solution evaluates include and exclude modes, see Create and apply resource filters in the Administrator guide.
