Example 3: Multi-tenant access control for RBAC and ABAC with OPA and Rego
To enhance the RBAC example in the previous section, you can add attributes to users.
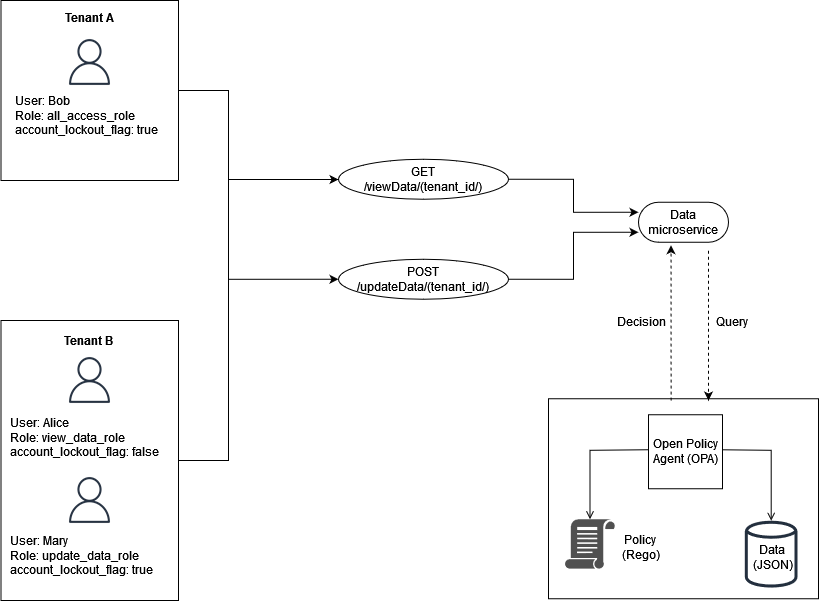
This example includes the same roles from the previous example, but adds the user
attribute account_lockout_flag. This is a user-specific
attribute that isn't associated with any particular role. You can use the same RBAC
external data that you used previously for this example:
 {
    "roles": {
        "tenant_a": {
            "all_access_role": ["viewData", "updateData"]
        },
        "tenant_b": {
            "update_data_role": ["updateData"],
            "view_data_role": ["viewData"]
        }
    }
}
The account_lockout_flag user attribute can be passed to the
Data service as part of the input to an OPA query for
/viewData/tenant_a for the user Bob:
 {
    "tenant_id": "tenant_a",
    "role": "all_access_role",
    "path": ["viewData", "tenant_a"],
    "method": "GET",
    "account_lockout_flag": "true"
}
The rule that is queried for the access decision is similar to the previous
examples, but includes an additional line to check for the
account_lockout_flag attribute:
default allowViewData = false
allowViewData = true {
    input.method == "GET"
    input.path = ["viewData", tenant_id]
    input.tenant_id == tenant_id
    role_permissions := data.roles[input.tenant_id][input.role][_]
    contains(role_permissions, "viewData")
    input.account_lockout_flag == "false"
}
This query returns an authorization decision of false. This
is because the account_lockout_flag attribute is
true for Bob, and the Rego rule
allowViewData denies access although Bob has the
correct role and tenant.
