Tutorial: Getting started with security in Amazon OpenSearch Serverless (console)
In this tutorial, you create and manage security policies using the Amazon OpenSearch Serverless console.
You complete the following steps in this tutorial:
This tutorial shows you how to set up a collection using the AWS Management Console. For the same steps using the AWS CLI, see Tutorial: Getting started with security in Amazon OpenSearch Serverless (CLI).
Step 1: Configure permissions
Note
You can skip this step if you're already using a more broad identity-based
policy, such as Action":"aoss:*" or Action":"*". In
production environments, however, follow the principle of
least privilege and only assign the minimum permissions necessary to complete a
task.
To complete this tutorial, you must have the correct IAM permissions. Your user or role must have an attached identity-based policy with the following minimum permissions:
For a full list of OpenSearch Serverless permissions, see Identity and Access Management for Amazon OpenSearch Serverless.
Step 2: Create an encryption policy
Encryption policies specify the AWS KMS key that OpenSearch Serverless uses to encrypt the collection. You can encrypt collections with an AWS managed key or a different key. For simplicity in this tutorial, you encrypt your collection with an AWS managed key.
To create an encryption policy
-
Open the Amazon OpenSearch Service console at https://console.aws.amazon.com/aos/home
. -
Expand Serverless in the left navigation pane and choose Encryption policies.
-
Choose Create encryption policy.
-
Name the policy
books-policy. For the description, enterEncryption policy for books collection. -
Under Resources, enter
books, which is what you name your collection. If you want to be more broad, you can include an asterisk (books*) to make the policy apply to all collections beginning with the word "books". -
For Encryption, keep Use AWS owned key selected.
-
Choose Create.
Step 3: Create a network policy
Network policies determine whether your collection is accessible over the internet from public networks, or whether it must be accessed through OpenSearch Serverless–managed VPC endpoints. In this tutorial, you configure public access.
To create a network policy
-
Choose Network policies in the left navigation pane and choose Create network policy.
-
Name the policy
books-policy. For the description, enterNetwork policy for books collection. -
Under Rule 1, name the rule
Public access
                            for books collection
. -
For simplicity in this tutorial, configure public access for the books collection. For the access type, select Public.
-
You access the collection from OpenSearch Dashboards. To do this, you need to configure network access for Dashboards and the OpenSearch endpoint, otherwise Dashboards won't function.
For the resource type, enable both Access to OpenSearch endpoints and Access to OpenSearch Dashboards.
-
In both input boxes, enter
Collection Name = books. This setting scopes the policy down so that it only applies to a single collection (books). Your rule should look like this: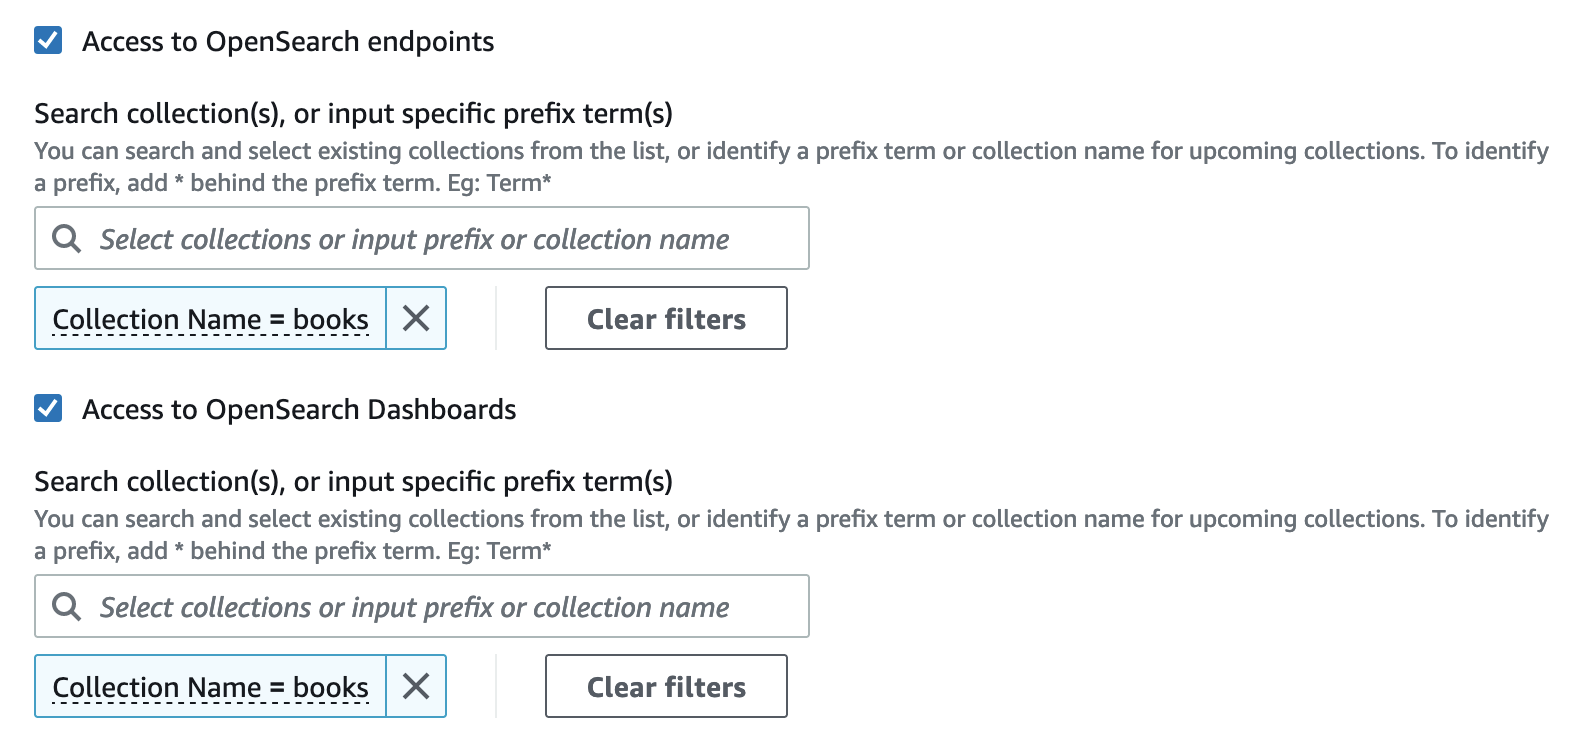
-
Choose Create.
Step 4: Create a data access policy
You can't access your collection data until you configure data access. Data access policies are separate from the IAM identity-based policy that you configured in step 1. They allow users to access the actual data within a collection.
In this tutorial, you provide a single user the permissions required to index data into the books collection.
To create a data access policy
-
Choose Data access policies in the left navigation pane and choose Create access policy.
-
Name the policy
books-policy. For the description, enterData access policy for books collection. -
Select JSON for the policy definition method and paste the following policy in the JSON editor.
Replace the principal ARN with the ARN of the account that you use to log in to OpenSearch Dashboards and index data.
[
   {
      "Rules":[
         {
            "ResourceType":"index",
            "Resource":[
               "index/books/*"
            ],
            "Permission":[
               "aoss:CreateIndex",
               "aoss:DescribeIndex",
               "aoss:ReadDocument",
               "aoss:WriteDocument",
               "aoss:UpdateIndex",
               "aoss:DeleteIndex"
            ]
         }
      ],
      "Principal":[
         "arn:aws:iam::123456789012:user/my-user"
      ]
   }
]
This policy provides a single user the minimum permissions required to create an index in the books collection, index some data, and search for it.
-
Choose Create.
Step 5: Create a collection
Now that you configured encryption and network policies, you can create a collection that matches them. OpenSearch Serverless automatically applies the security settings.
To create an OpenSearch Serverless collection
-
Choose Collections in the left navigation pane and choose Create collection.
-
In the Serverless generation field, choose Switch to Classic if not already on Classic.
-
For the collection name, enter
books. -
For collection type, choose Search.
-
Under Encryption, OpenSearch Serverless informs you that the collection name matches the
books-policyencryption policy. -
Under Network access settings, OpenSearch Serverless informs you that the collection name matches the
books-policynetwork policy. -
Choose Next.
-
Under Data access policy options, OpenSearch Serverless informs you that the collection name matches the
books-policydata access policy. -
Choose Next.
-
Under Configure OpenSearch UI, configure the OpenSearch application and workspace for your collection. Choose Select existing OpenSearch application or Create new OpenSearch application, and select or create a workspace. Choose Next.
-
Review the collection configuration and choose Submit. Collections typically take less than a minute to initialize.
Note
This tutorial uses the Classic collection creation flow to demonstrate how pre-configured security policies are automatically matched during collection creation. For information about creating collections using the NextGen flow, see Creating collections.
Step 6: Upload and search data
You can upload data to an OpenSearch Serverless collection using Postman or curl. For brevity, these examples use Dev Tools within the OpenSearch Dashboards console.
To index and search data in a collection
-
Choose Collections in the left navigation pane and choose the books collection to open its details page.
-
Choose the OpenSearch Dashboards URL for the collection. The URL takes the format
https://.collection-id.us-east-1.aoss.amazonaws.com/_dashboards -
Sign in to OpenSearch Dashboards using the AWS access and secret keys for the principal that you specified in your data access policy.
-
Within OpenSearch Dashboards, open the left navigation menu and choose Dev Tools.
-
To create a single index called books-index, run the following command:
PUT books-index
-
To index a single document into books-index, run the following command:
PUT books-index/_doc/1 { "title": "The Shining", "author": "Stephen King", "year": 1977 } -
To search data in OpenSearch Dashboards, you need to configure at least one index pattern. OpenSearch uses these patterns to identify which indexes you want to analyze. Open the Dashboards main menu, choose Stack Management, choose Index Patterns, and then choose Create index pattern. For this tutorial, enter books-index.
-
Choose Next step and then choose Create index pattern. After the pattern is created, you can view the various document fields such as
authorandtitle. -
To begin searching your data, open the main menu again and choose Discover, or use the search API
.
