Update software on your WordPress instance
Important
This tutorial applies to instances that use the WordPress blueprint.
If your instance uses WordPress packaged by Bitnami, see the Bitnami
WordPress documentation/opt/bitnami) and use different service
management tools.
Amazon Web Services (AWS) and Lightsail do not update or patch the operating system or
applications on your instance after you create it. WordPress does install some updates on its
own. By default, it installs minor core releases that contain security and maintenance fixes.
It doesn't install major core releases automatically. Plugin and theme updates are also manual
until you turn on automatic updates for them. Under the AWS Shared
Responsibility Model
WordPress software updates regularly include security fixes. Running outdated versions of WordPress core, themes, or plugins is one of the most common causes of compromised websites.
This guide shows you which updates WordPress installs automatically, how to update the WordPress software manually, and how to turn on automatic updates for plugins and themes.
Understand WordPress update types
WordPress software updates fall into the following categories. Each has a different risk profile and update mechanism.
| Update type | Example | Default behavior |
|---|---|---|
| Core minor releases (maintenance and security) | 6.5.1 to 6.5.2 | WordPress installs these automatically in the background |
| Core major releases (feature releases) | 6.5 to 6.6 | Manual only |
| Themes and plugins | Any theme or plugin version | Manual by default; you can enable automatic updates per theme or plugin |
| Translations | Language pack updates | WordPress installs these automatically |
Since WordPress 3.7, WordPress automatically installs minor core releases that contain
security and maintenance fixes. This is the default behavior unless you have disabled it.
This means a running WordPress instance already receives critical security patches for its
current branch. However, when a release branch stops receiving security backports, you must
update to a newer major version to keep receiving fixes. For more information, see Updating
WordPress
Prerequisites
-
You launched a WordPress instance in Lightsail. For more information, see Launch and configure a WordPress instance.
-
You have the administrator password for your WordPress website. For more information, see Get the admin password for your WordPress website.
Step 1: Back up your instance with a snapshot
Before you update any software, create a backup of your instance. If an update fails or is incompatible with your themes or plugins, you can restore your website from the snapshot.
-
Sign in to the Lightsail console
. -
Open the instance management page for your WordPress instance.

-
Choose the Snapshots tab.
-
Under Manual snapshots, choose Create snapshot, enter a name, and then choose Create.
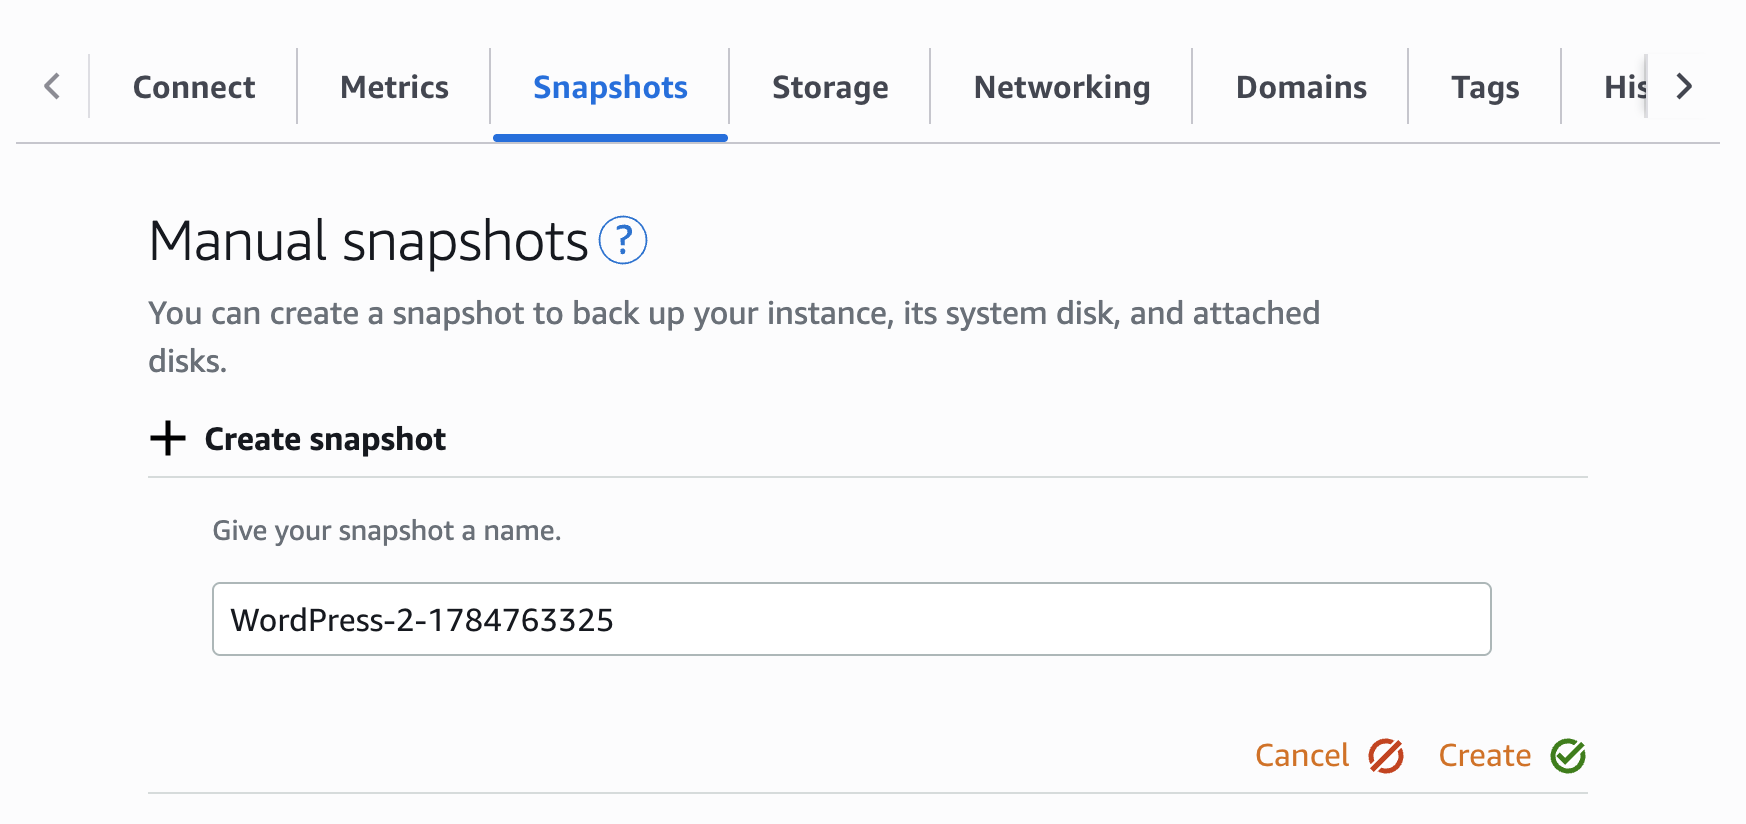
For more information, see Back up Linux/Unix Lightsail instances with snapshots and Configure automatic snapshots.
Note
For major version updates, we recommend that you first test the update on a new instance created from your snapshot before you apply it to your live website.
Note
Snapshots incur a monthly storage fee, and they continue to accrue charges until you
delete them. For snapshot pricing, retention, and how to remove snapshots that you no longer
need, see Snapshots in Amazon Lightsail, Delete unused Lightsail snapshots to avoid monthly charges, and the Lightsail pricing page
Step 2: Update WordPress
Option 1: Update WordPress from the administration dashboard
The simplest way to update WordPress core, themes, and plugins is the one-click update in the WordPress administration dashboard.
-
Navigate to the administration dashboard of your WordPress website at
https://, and sign in with the user nameyour-ip/wp-adminuserand your administrator password. If you don't have your administrator password, see Get the admin password for your WordPress website. -
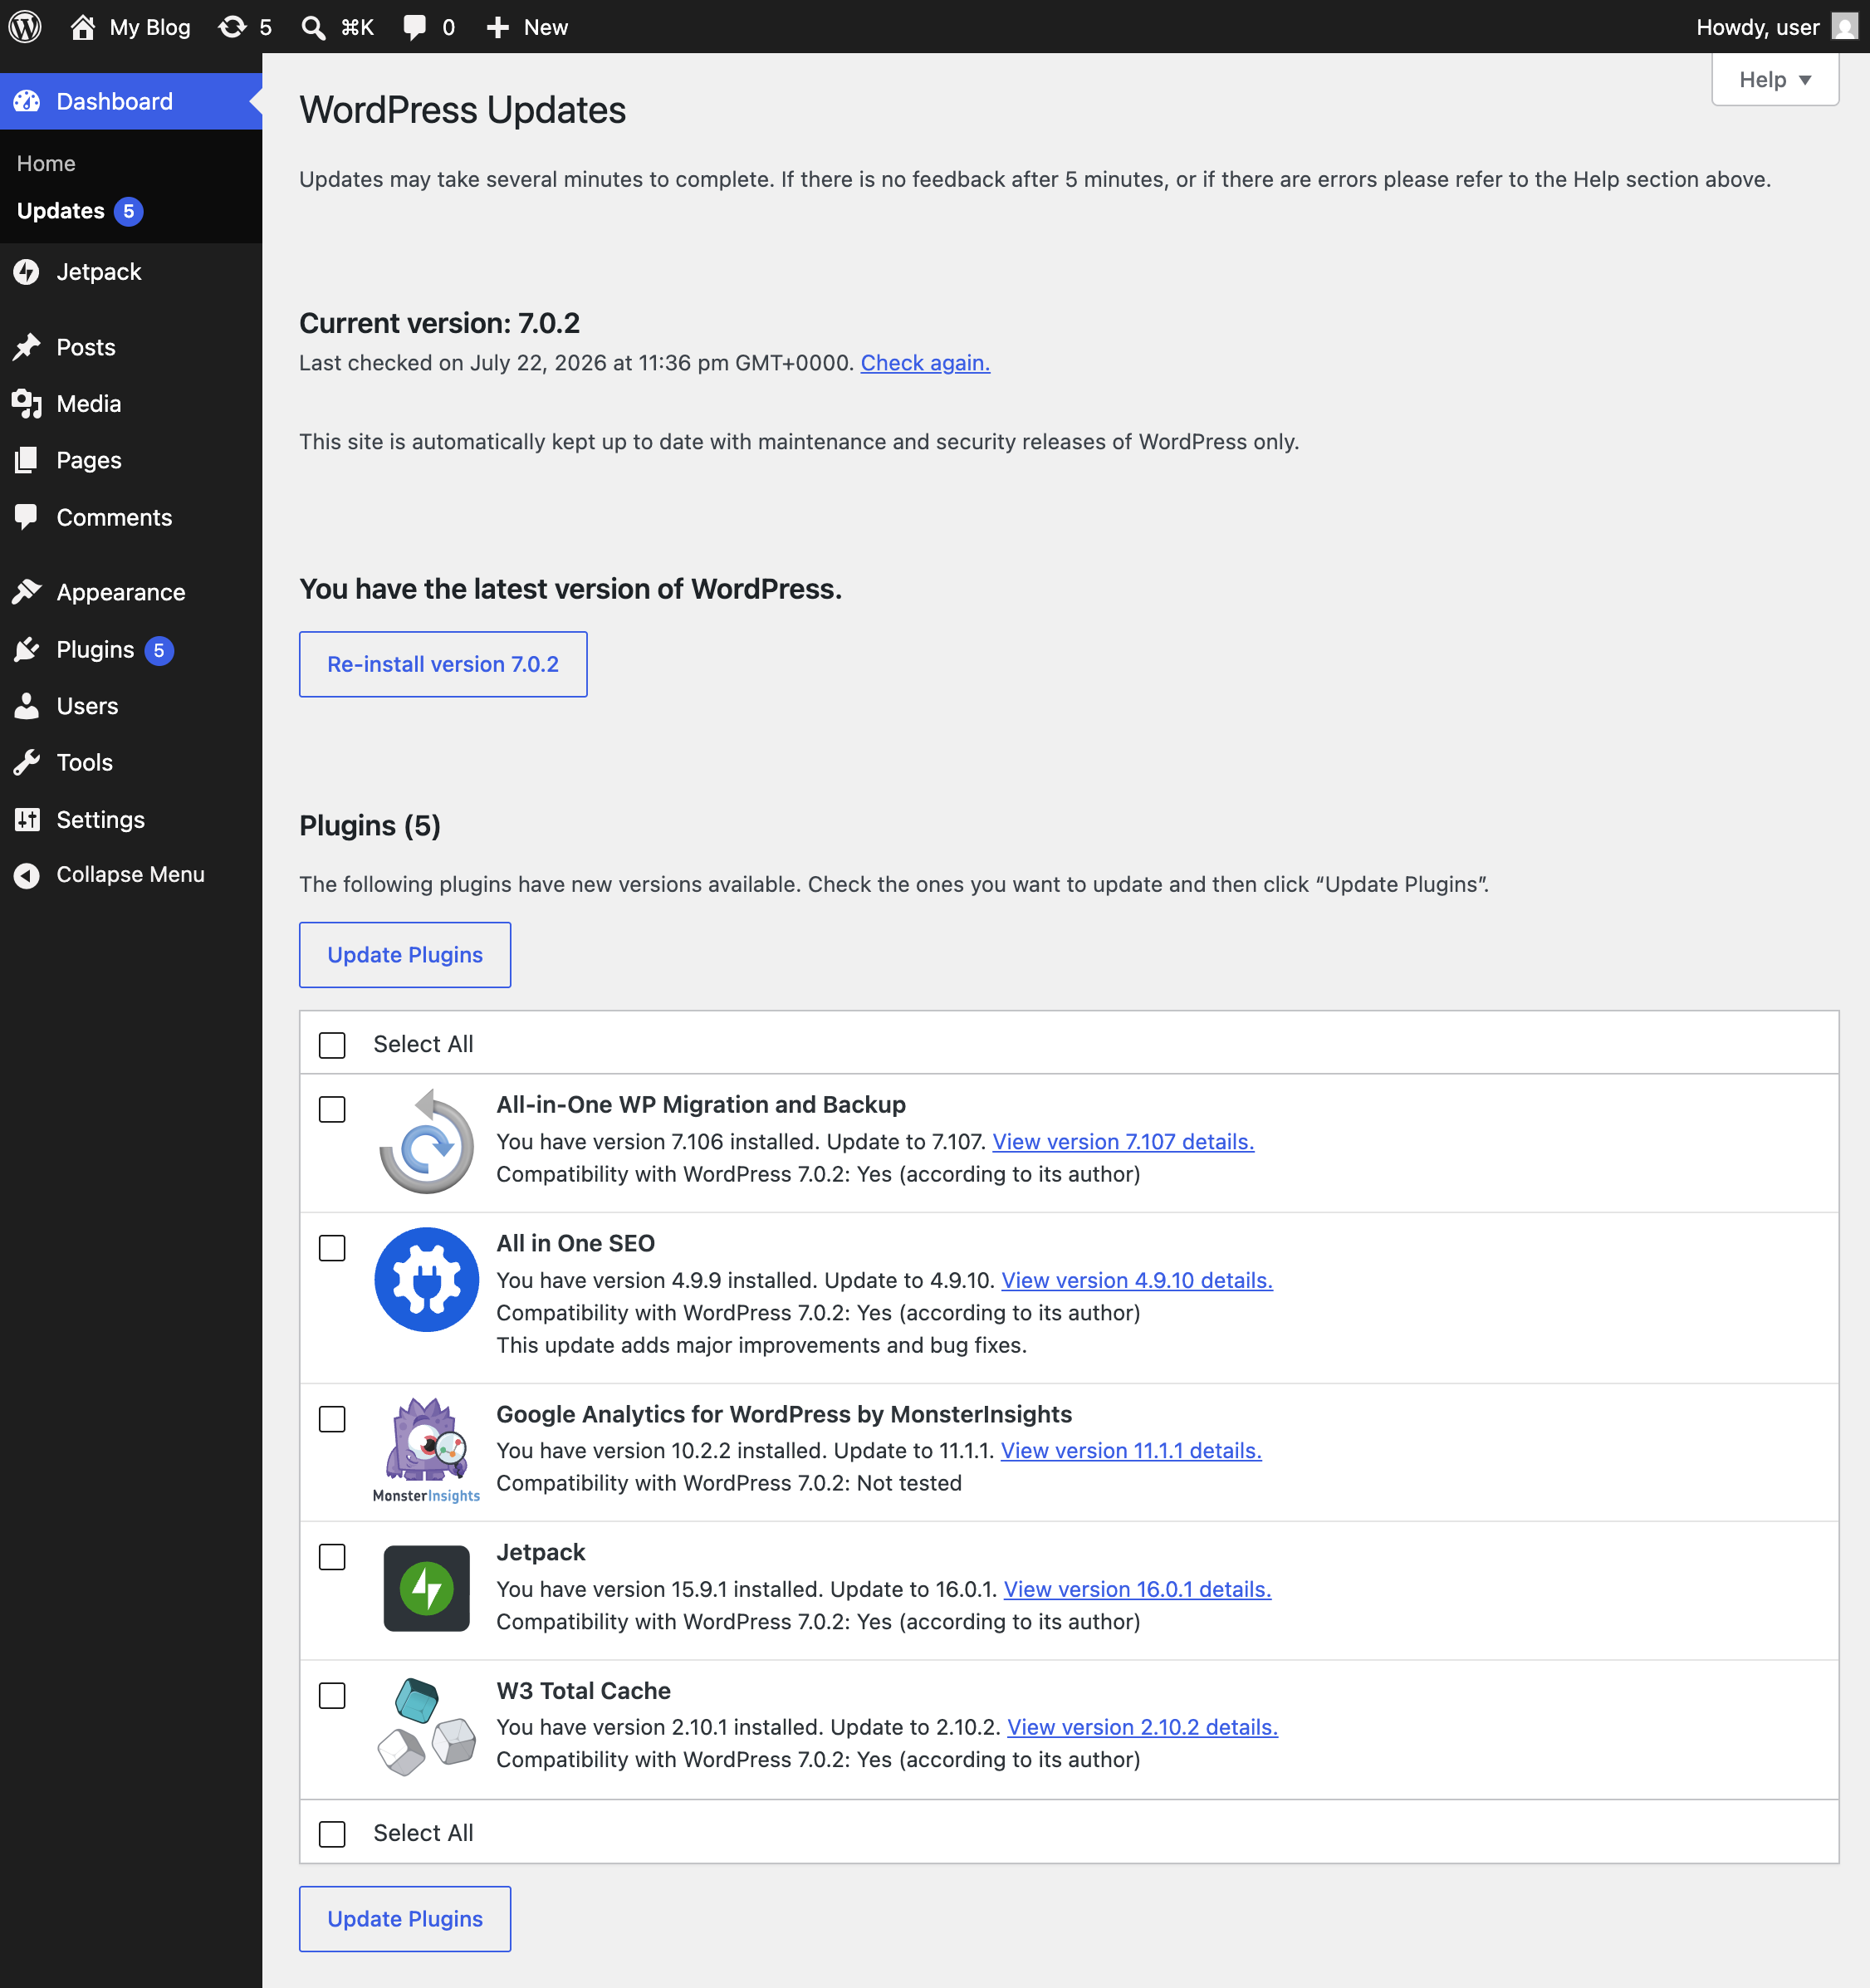
In the left navigation pane, choose Dashboard, and then choose Updates. A number badge on the menu item indicates how many updates are available.
-
Under Current version, if a newer version of WordPress is available, choose Update to version
X.X.X.WordPress places your website in maintenance mode, downloads the new version, and installs it. Visitors briefly see a maintenance message while the update runs.

-
If prompted, choose Update WordPress Database. WordPress stores your content, settings, and user data in a database. A core update sometimes requires changes to how that data is organized. For example, adding new columns or tables. Choosing this button applies those structural changes so the new version of WordPress works correctly.
-
Under the Plugins section of the Updates page, select the plugins to update, and then choose Update Plugins.

-
Under the Themes section, select the themes to update, and then choose Update Themes.

-
After the updates complete, browse your website and confirm your pages, themes, and plugins work as expected.
Note
Remove plugins and themes that you no longer use. Inactive plugins and themes still add attack surface and must be kept up to date. For more information, see Tips and best practices for WordPress instances in Amazon Lightsail.
Option 2: Update WordPress from the command line
You can also update WordPress from within your instance by using WP-CLI, the command
line interface for WordPress. This is useful for scripting updates or when you can't access
the administration dashboard. For more information, see the WP-CLI website
On the WordPress blueprint, the WordPress installation directory is
/var/www/html, and WP-CLI is preinstalled and preconfigured with this path,
so you don't need to pass a --path parameter. The WordPress files are owned by
the admin user.
Important
Run WP-CLI commands as the admin user that you sign in with. Do not run
them with sudo or as another user. Running updates as a different user can
leave behind directories that the admin user can't write to, causing later
updates to fail. If that happens, see Troubleshooting.
-
Connect to your instance by using the browser-based SSH client in the Lightsail console, or by using your own SSH client with the user name
admin. For more information, see Connect to Linux or Unix instances on Lightsail. -
Verify the WP-CLI version. WP-CLI is preinstalled on the WordPress blueprint:
wp --version -
Check the currently installed WordPress version and available updates:
wp core check-update -
Update WordPress core, then update the database schema:
wp core update wp core update-db -
Update all plugins and themes:
wp plugin update --all wp theme update --all -
Verify the installed version:
wp core version
Step 3: Enable automatic updates
When you enable automatic updates, your website spends less time running software with known vulnerabilities.
WordPress core
Your WordPress instance installs maintenance and security releases automatically. It doesn't install major releases automatically. To move to a new major release, update WordPress manually as described in Step 2. We recommend that you create a snapshot first, and that you test the update on an instance created from that snapshot.
Plugins and themes
-
In the left navigation pane, choose Plugins, and then choose Installed Plugins.
-
In the Automatic Updates column, choose Enable auto-updates for each plugin that you want WordPress to update automatically.
-
To enable automatic updates for themes, choose Appearance, choose Themes, select a theme, and then choose Enable auto-updates.
Note
The same risk applies to plugin and theme auto-updates: they run without a fresh backup. Enable them selectively for plugins and themes from well-maintained sources, and keep automatic snapshots enabled.
Automatic updates from the command line
You can also turn on automatic plugin and theme updates with WP-CLI instead of the
administration dashboard. Connect to your instance, and then run the following commands as
the admin user.
-
Turn on automatic updates for all plugins and themes:
wp plugin auto-updates enable --all wp theme auto-updates enable --all -
Confirm which plugins and themes have automatic updates turned on:
wp plugin auto-updates status --all
wp theme auto-updates status --all
Note
These commands apply to plugins and themes only. You can't change the core update setting from the command line.
Step 4: Keep the operating system up to date
Updating the WordPress application alone is not enough to keep your instance secure. The underlying operating system, web server, PHP runtime, and database also receive security patches. The WordPress blueprint runs on Debian, which uses the APT package manager.
-
Connect to your instance by using the browser-based SSH client in the Lightsail console, or by using your own SSH client with the user name
admin. For more information, see Connect to Linux or Unix instances on Lightsail. -
Update the package lists and apply all available upgrades:
sudo apt update sudo apt upgrade -y -
If a kernel update was installed, reboot the instance during a low-traffic window:
sudo reboot
Important
If your instance doesn't have a static IP address attached, its public IP address changes when you stop and start the instance. Attach a static IP address before rebooting if your DNS records point to the instance's public IP. For more information, see Create and attach a static IP to your Lightsail instance.
Troubleshooting
Your website is stuck in maintenance mode
If an update is interrupted, your website might continue to display "Briefly unavailable for scheduled maintenance." To resolve this, connect to your instance by using SSH and delete the maintenance flag file from the WordPress installation directory:
rm /var/www/html/.maintenance
An update broke your website
Restore your instance from the snapshot that you created in Step 1. For more information, see Create Lightsail instances from snapshots. Then identify the incompatible theme or plugin by testing the update on a non-production copy of your instance.
Plugin or theme updates fail with "Could not move the old version to the upgrade-temp-backup directory"
Before installing an update, WordPress moves the old version to
wp-content/upgrade-temp-backup so that it can restore it if the update
fails. If you see this warning, update the directory's ownership and permissions, and then
retry the update:
sudo chown -R admin:www-data /var/www/html/wp-content/upgrade-temp-backup
sudo find /var/www/html/wp-content/upgrade-temp-backup -type d -exec chmod 2775 {} \;
sudo find /var/www/html/wp-content/upgrade-temp-backup -type f -exec chmod 0664 {} \;
The update fails safely: your website continues to run the old plugin or theme version until the update succeeds.
The one-click update fails with a file permissions error
The dashboard update runs as the web server user, which requires group write access to the WordPress files. This typically happens after you upload plugin, theme, or other files manually over SSH or SFTP, which creates files without group write permission. Connect to your instance by using SSH and restore the ownership and permissions that the blueprint uses:
sudo chown -R admin:www-data /var/www/html/wp-content
sudo find /var/www/html/wp-content -type d -exec chmod 2775 {} \;
sudo find /var/www/html/wp-content -type f -exec chmod 0664 {} \;
