Set up and configure Magento on Lightsail
Did you know?
Lightsail stores seven daily snapshots and automatically replaces the oldest with the newest when you enable automatic snapshots for your instance. For more information, see Configure automatic snapshots for Lightsail instances and disks .
Here are a few steps you should complete to get started after your Magento instance is up and running on Amazon Lightsail.
Contents
Step 1: Get the default application password for your Magento website
Complete the following steps to get the default application password for your Magento website. For more information, see Getting the application user name and password for your Bitnami instance in Amazon Lightsail.
-
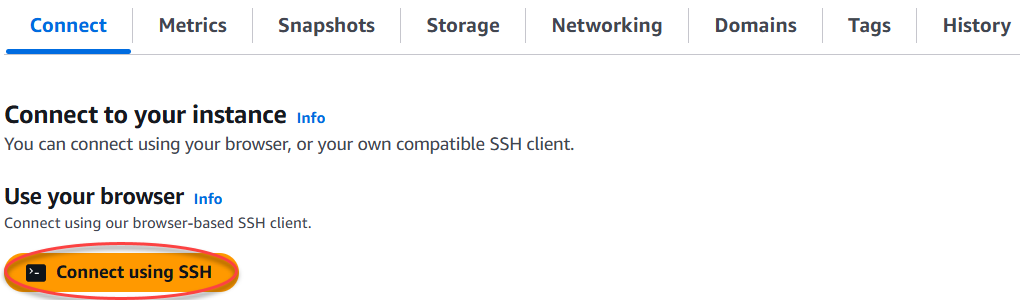
On the instance management page, under the Connect tab, choose Connect using SSH.

-
After you're connected, enter the following command to get the default application password:
cat $HOME/bitnami_application_passwordYou should see a response similar to the following example, which contains the default application password. Store this password in a safe place. You will use it in the next section of this tutorial to sign in to the administration dashboard of your Magento website.

Step 2: Attach a static IP address to your Magento instance
The default dynamic public IP address attached to your instance changes every time you stop and start the instance. You can create a static IP address and attach it to your instance to keep the public IP address from changing. Later, when you use your domain name with your instance, you don’t have to update your domain’s DNS records each time you stop and start the instance. You can attach only one static IP address to each instance.
On the instance management page, under the Networking tab, choose Create a static IP or Attach static IP (if you previously created a static IP that you can attach to your instance), then follow the instructions on the page. For more information, see Create a static IP and attach it to an instance.

After the new static IP address is attached to your instance, you must complete the following steps to make the Magento software aware of the new static IP address.
-
Make a note of the static IP address of your instance. It's listed in the header section of your instance management page.

-
On the instance management page, under the Connect tab, choose Connect using SSH.
-
After you're connected, enter the following command. Be sure to replace
<StaticIP>with the new static IP address of your instance.sudo /opt/bitnami/configure_app_domain --domain<StaticIP>Example:
sudo /opt/bitnami/configure_app_domain --domain203.0.113.0You should see a response similar to the following example. The Magento software should now be aware of the new static IP address.

Note
Magento does not currently support IPv6 addresses. You can enable IPv6 for the instance, but the Magento software will not respond to requests over the IPv6 network.
Step 3: Sign in to the administration dashboard of your Magento website
Complete the following step to access your Magento website and sign in to its
administration dashboard. To sign in, you will use the default user name (user)
and the default application password that you got earlier in this guide.
-
In the Lightsail console, make note of the public or static IP address that is listed in the header area of the instance management page.
-
Browse to the following address to access the sign in page for the administration dashboard of your Magento website. Be sure to replace
<InstanceIpAddress>with the public or static IP address of your instance.http://<InstanceIpAddress>/adminExample:
http://203.0.113.0/adminNote
You might need to reboot the instance if you can't access the sign in page for the Magento administration dashboard.
-
Enter the default user name (
user), the default application password you got earlier in this guide, and choose Sign in.
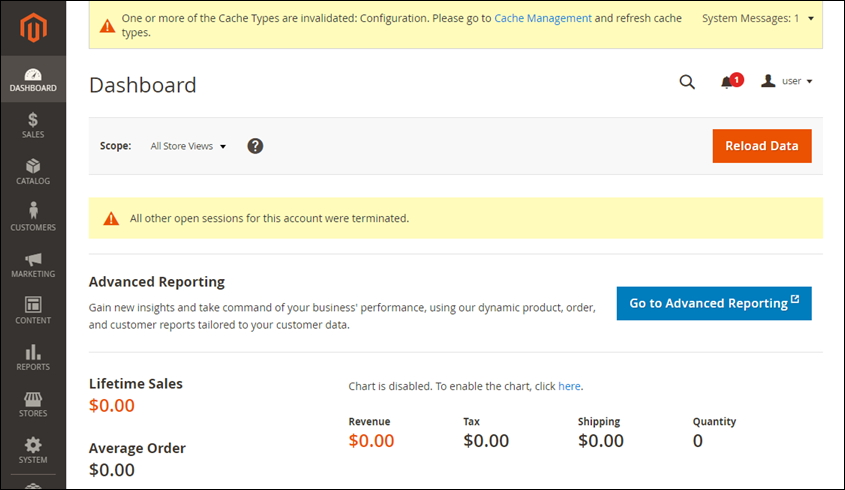
The Magento administration dashboard appears.
To change the default user name or password that you use to sign in to the administration
dashboard of your Magento website, choose System in the navigation pane,
and then choose All Users. For more information, see Adding
users

For more information about the administration dashboard, see Magento 2.4 User Guide
Step 4: Route traffic for your registered domain name to your Magento website
To route traffic for your registered domain name, such as example.com, to
your Magento website, you add a record to the domain name system (DNS) of your domain. DNS
records are typically managed and hosted at the registrar where you registered your domain.
However, we recommend that you transfer management of your domain's DNS records to Lightsail
so that you can administer it using the Lightsail console.
On the Lightsail console home page, under the Domains & DNS tab, choose Create DNS zone, then follow the instructions on the page. For more information, see Creating a DNS zone to manage your domain’s DNS records in Lightsail.
After your domain name is routing traffic to your instance, you must complete the following steps to make the Magento software aware of the domain name.
-
On the instance management page, under the Connect tab, choose Connect using SSH.
-
After you're connected, enter the following command. Be sure to replace
<DomainName>with the domain name that is routing traffic to your instance.sudo /opt/bitnami/configure_app_domain --domain<DomainName>Example:
sudo /opt/bitnami/configure_app_domain --domainwww.example.comYou should see a response similar to the following example. The Magento software should now be aware of the domain name.

Step 5: Configure HTTPS for your Magento website
Complete the following steps to configure HTTPS on your Magento website. These steps show you how to use the Bitnami HTTPS configuration tool (bncert), which is a command line tool for requesting SSL/TLS certificates, setting up redirections (e.g. HTTP to HTTPS), and renewing certificates.
Important
The bncert tool will issue certificates only for domains that are currently routing traffic to the public IP address of your Magento instance. Before starting with these steps, make sure that you add DNS records to the DNS of all domains that you want to use with your Magento website.
-
On the instance management page, under the Connect tab, choose Connect using SSH.
-
After you're connected, enter the following command to start the bncert-tool.
sudo /opt/bitnami/bncert-toolYou should see a response similar to the following example:

-
Enter your primary domain name and alternate domain names separated by a space as shown in the following example.

-
The changes that are going to be made are listed. Type
Yand press Enter to confirm and continue.
-
Enter your email address to associate with your Let's Encrypt certificate and press Enter.

-
Review the Let's Encrypt Subscriber Agreement. Type
Yand press Enter to accept the agreement and continue.
The actions are performed to enable HTTPS on your instance, including requesting the certificate and configuring the redirections you specified.

Your certificate is successfully issued and validated, and the redirections are successfully configured on your instance if you see a message similar to the following example.

The
bncerttool will perform an automatic renewal of your certificate every 80 days before it expires. Continue to the next set of steps to finish enabling HTTPS on your Magento website. -
Browse to the following address to access the sign in page for the administration dashboard of your Magento website. Be sure to replace
<DomainName>with the registered domain name that is routing traffic to your instance.http://<DomainName>/adminExample:
http://www.example.com/admin -
Enter the default user name (
user), the default application password you got earlier in this guide, and choose Sign in.
The Magento administration dashboard appears.
-
Choose Stores in the navigation pane, and then choose Configuration.

-
Choose Web, and then expand the Base URLs node.
-
In the Base URL text box, enter the full URL of your website, for example
https://www.example.com/.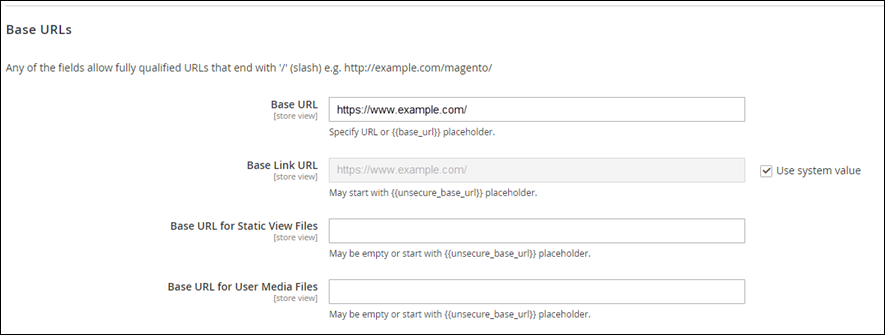
-
Expand the Base URLs (Secure) node.
-
In the Secure Base URL text box, enter the full URL of your website, for example
https://www.example.com/.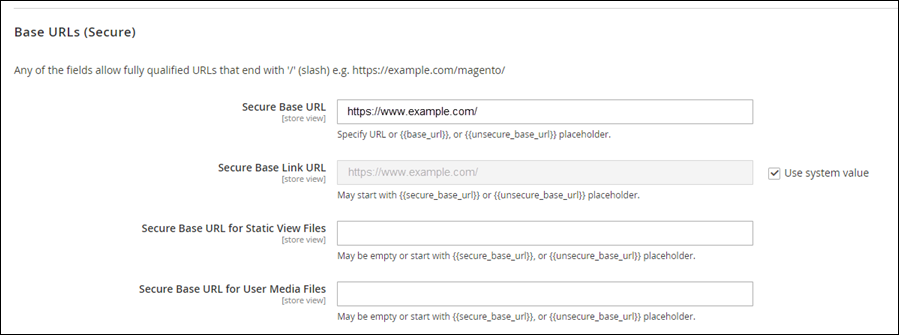
-
Choose Yes for the Use Secure URLs on Storefront, Use Secure URLs in Admin, and Upgrade Insecure Requests options.

-
Choose Save Config at the top of the page.
HTTPS is now configured for your Magento website. When customers browse to the HTTP version (e.g.,
http://www.example.com) of your Magento website, they will be automatically redirected to the HTTPS version (e.g.,https://www.example.com).
Step 6: Configure SMTP for email notifications
Configure the SMTP settings of your Magento website to enable email notifications for it.
For more information, see Install the Magento Magepal SMTP extension
Important
If you configure SMTP to use ports 25, 465, or 587, then you must open those ports in the firewall of your instance in the Lightsail console. For more information, see Adding and editing instance firewall rules in Amazon Lightsail.
If you configure your Gmail account to send email on your Magento website, then you must
use an app password instead of using the standard password that you use to sign in to Gmail.
For more information, see Sign in with App
Passwords
Step 7: Read the Bitnami and Magento documentation
Read the Bitnami documentation to learn how to perform administrative tasks on your
Magento instance and website, such as install plugins and customize the theme. For more
information, see Bitnami Magento Stack
for AWS Cloud
You should also read the Magento documentation to learn how to administer your Magento
website. For more information, see the Magento 2.4 User Guide
Step 8: Create a snapshot of your Magento instance
After you configure your website the way you want it, create periodic snapshots of your instance to back it up. A snapshot is a copy of the system disk and original configuration of an instance. A snapshot contains all of the data that is needed to restore your instance (from the moment when the snapshot was taken).
You can create snapshots manually, or enable automatic snapshots to have Lightsail create daily snapshots for you. If something goes wrong with your instance, you can create a new replacement instance using the snapshot.
You can work with snapshots on your instance's management page on the Snapshots tab. For more information, see Snapshots in Amazon Lightsail.

