# Creating Lambda durable functions
To get started with Lambda durable functions, use the Lambda console to create a durable function. In a few minutes, you can create and deploy a durable function that uses steps and waits to demonstrate checkpoint-based execution.
As you carry out the tutorial, you'll learn fundamental durable function concepts, like how to use the `DurableContext` object, create checkpoints with steps, and pause execution with waits. You'll also learn how replay works when your function resumes after a wait.
To keep things simple, this tutorial shows you how to create your function using either the Python or Node.js runtime. With these interpreted languages, you can edit function code directly in the console's built-in code editor.
**Note**
Durable functions currently support Python, Node.js (JavaScript/TypeScript), and Java runtimes, as well as container images (OCI). For a complete list of supported runtime versions and container image options, see [Supported runtimes for durable functions](durable-supported-runtimes.md). For more information about using container images with Lambda, see [Creating Lambda container images](https://docs.aws.amazon.com/lambda/latest/dg/images-create.html) in the Lambda Developer Guide.
**Tip**
To learn how to build **serverless solutions**, check out the [Serverless Developer Guide](https://docs.aws.amazon.com/serverless/latest/devguide/).
## Prerequisites
### Sign up for an AWS account
If you do not have an AWS account, complete the following steps to create one.
**To sign up for an AWS account**
1. Open [https://portal.aws.amazon.com/billing/signup](https://portal.aws.amazon.com/billing/signup).
1. Follow the online instructions.
Part of the sign-up procedure involves receiving a phone call or text message and entering a verification code on the phone keypad.
When you sign up for an AWS account, an *AWS account root user* is created. The root user has access to all AWS services and resources in the account. As a security best practice, assign administrative access to a user, and use only the root user to perform [tasks that require root user access](https://docs.aws.amazon.com/IAM/latest/UserGuide/id_root-user.html#root-user-tasks).
AWS sends you a confirmation email after the sign-up process is complete. At any time, you can view your current account activity and manage your account by going to [https://aws.amazon.com/](https://aws.amazon.com/) and choosing **My Account**.
### Create a user with administrative access
After you sign up for an AWS account, secure your AWS account root user, enable AWS IAM Identity Center, and create an administrative user so that you don't use the root user for everyday tasks.
**Secure your AWS account root user**
1. Sign in to the [AWS Management Console](https://console.aws.amazon.com/) as the account owner by choosing **Root user** and entering your AWS account email address. On the next page, enter your password.
For help signing in by using root user, see [Signing in as the root user](https://docs.aws.amazon.com/signin/latest/userguide/console-sign-in-tutorials.html#introduction-to-root-user-sign-in-tutorial) in the *AWS Sign-In User Guide*.
1. Turn on multi-factor authentication (MFA) for your root user.
For instructions, see [Enable a virtual MFA device for your AWS account root user (console)](https://docs.aws.amazon.com/IAM/latest/UserGuide/enable-virt-mfa-for-root.html) in the *IAM User Guide*.
**Create a user with administrative access**
1. Enable IAM Identity Center.
For instructions, see [Enabling AWS IAM Identity Center](https://docs.aws.amazon.com//singlesignon/latest/userguide/get-set-up-for-idc.html) in the *AWS IAM Identity Center User Guide*.
1. In IAM Identity Center, grant administrative access to a user.
For a tutorial about using the IAM Identity Center directory as your identity source, see [ Configure user access with the default IAM Identity Center directory](https://docs.aws.amazon.com//singlesignon/latest/userguide/quick-start-default-idc.html) in the *AWS IAM Identity Center User Guide*.
**Sign in as the user with administrative access**
+ To sign in with your IAM Identity Center user, use the sign-in URL that was sent to your email address when you created the IAM Identity Center user.
For help signing in using an IAM Identity Center user, see [Signing in to the AWS access portal](https://docs.aws.amazon.com/signin/latest/userguide/iam-id-center-sign-in-tutorial.html) in the *AWS Sign-In User Guide*.
**Assign access to additional users**
1. In IAM Identity Center, create a permission set that follows the best practice of applying least-privilege permissions.
For instructions, see [ Create a permission set](https://docs.aws.amazon.com//singlesignon/latest/userguide/get-started-create-a-permission-set.html) in the *AWS IAM Identity Center User Guide*.
1. Assign users to a group, and then assign single sign-on access to the group.
For instructions, see [ Add groups](https://docs.aws.amazon.com//singlesignon/latest/userguide/addgroups.html) in the *AWS IAM Identity Center User Guide*.
## Create a Lambda durable function with the console
In this example, your durable function processes an order through multiple steps with automatic checkpointing. The function takes a JSON object containing an order ID, validates the order, processes payment, and confirms the order. Each step is automatically checkpointed, so if the function is interrupted, it resumes from the last completed step.
Your function also demonstrates a wait operation, pausing execution for a short period to simulate waiting for external confirmation.
**To create a durable function with the console**
1. Open the [Functions page](https://console.aws.amazon.com/lambda/home#/functions) of the Lambda console.
1. Choose **Create function**.
1. Select **Author from scratch**.
1. In the **Basic information** pane, for **Function name**, enter `myDurableFunction`.
1. For **Runtime**, choose either **Node.js 24** or **Python 3.14**.
1. Select **Enable durable execution**.
Lambda creates your durable function with an [execution role](lambda-intro-execution-role.md) that includes permissions for checkpoint operations (`lambda:CheckpointDurableExecution` and `lambda:GetDurableExecutionState`).
**Note**
Lambda runtimes include the Durable Execution SDK, so you can test durable functions without packaging dependencies. However, we recommend including the SDK in your deployment package for production. This ensures version consistency and avoids potential runtime updates that might affect your function.
Use the console's built-in code editor to add your durable function code.
------
#### [ Node.js ]
**To modify the code in the console**
1. Choose the **Code** tab.
In the console's built-in code editor, you should see the function code that Lambda created. If you don't see the **index.mjs** tab in the code editor, select **index.mjs** in the file explorer as shown on the following diagram.

1. Paste the following code into the **index.mjs** tab, replacing the code that Lambda created.
```
import {
withDurableExecution,
} from "@aws/durable-execution-sdk-js";
export const handler = withDurableExecution(
async (event, context) => {
const orderId = event.orderId;
// Step 1: Validate order
const validationResult = await context.step(async (stepContext) => {
stepContext.logger.info(`Validating order ${orderId}`);
return { orderId, status: "validated" };
});
// Step 2: Process payment
const paymentResult = await context.step(async (stepContext) => {
stepContext.logger.info(`Processing payment for order ${orderId}`);
return { orderId, status: "paid", amount: 99.99 };
});
// Wait for 10 seconds to simulate external confirmation
await context.wait({ seconds: 10 });
// Step 3: Confirm order
const confirmationResult = await context.step(async (stepContext) => {
stepContext.logger.info(`Confirming order ${orderId}`);
return { orderId, status: "confirmed" };
});
return {
orderId: orderId,
status: "completed",
steps: [validationResult, paymentResult, confirmationResult]
};
}
);
```
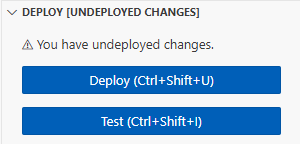
1. In the **DEPLOY** section, choose **Deploy** to update your function's code:
**Understanding your durable function code**
Before you move to the next step, let's look at the function code and understand key durable function concepts.
+ The `withDurableExecution` wrapper:
Your durable function is wrapped with `withDurableExecution`. This wrapper enables durable execution by providing the `DurableContext` object and managing checkpoint operations.
+ The `DurableContext` object:
Instead of the standard Lambda context, your function receives a `DurableContext`. This object provides methods for durable operations like `step()` and `wait()` that create checkpoints.
+ Steps and checkpoints:
Each `context.step()` call creates a checkpoint before and after execution. If your function is interrupted, it resumes from the last completed checkpoint. The function doesn't re-execute completed steps. It uses their stored results instead.
+ Wait operations:
The `context.wait()` call pauses execution without consuming compute resources. When the wait completes, Lambda invokes your function again and replays the checkpoint log, substituting stored values for completed steps.
+ Replay mechanism:
When your function resumes after a wait or interruption, Lambda runs your code from the beginning. However, completed steps don't re-execute. Lambda replays their results from the checkpoint log. This is why your code must be deterministic.
------
#### [ Python ]
**To modify the code in the console**
1. Choose the **Code** tab.
In the console's built-in code editor, you should see the function code that Lambda created. If you don't see the **lambda\_function.py** tab in the code editor, select **lambda\_function.py** in the file explorer as shown on the following diagram.
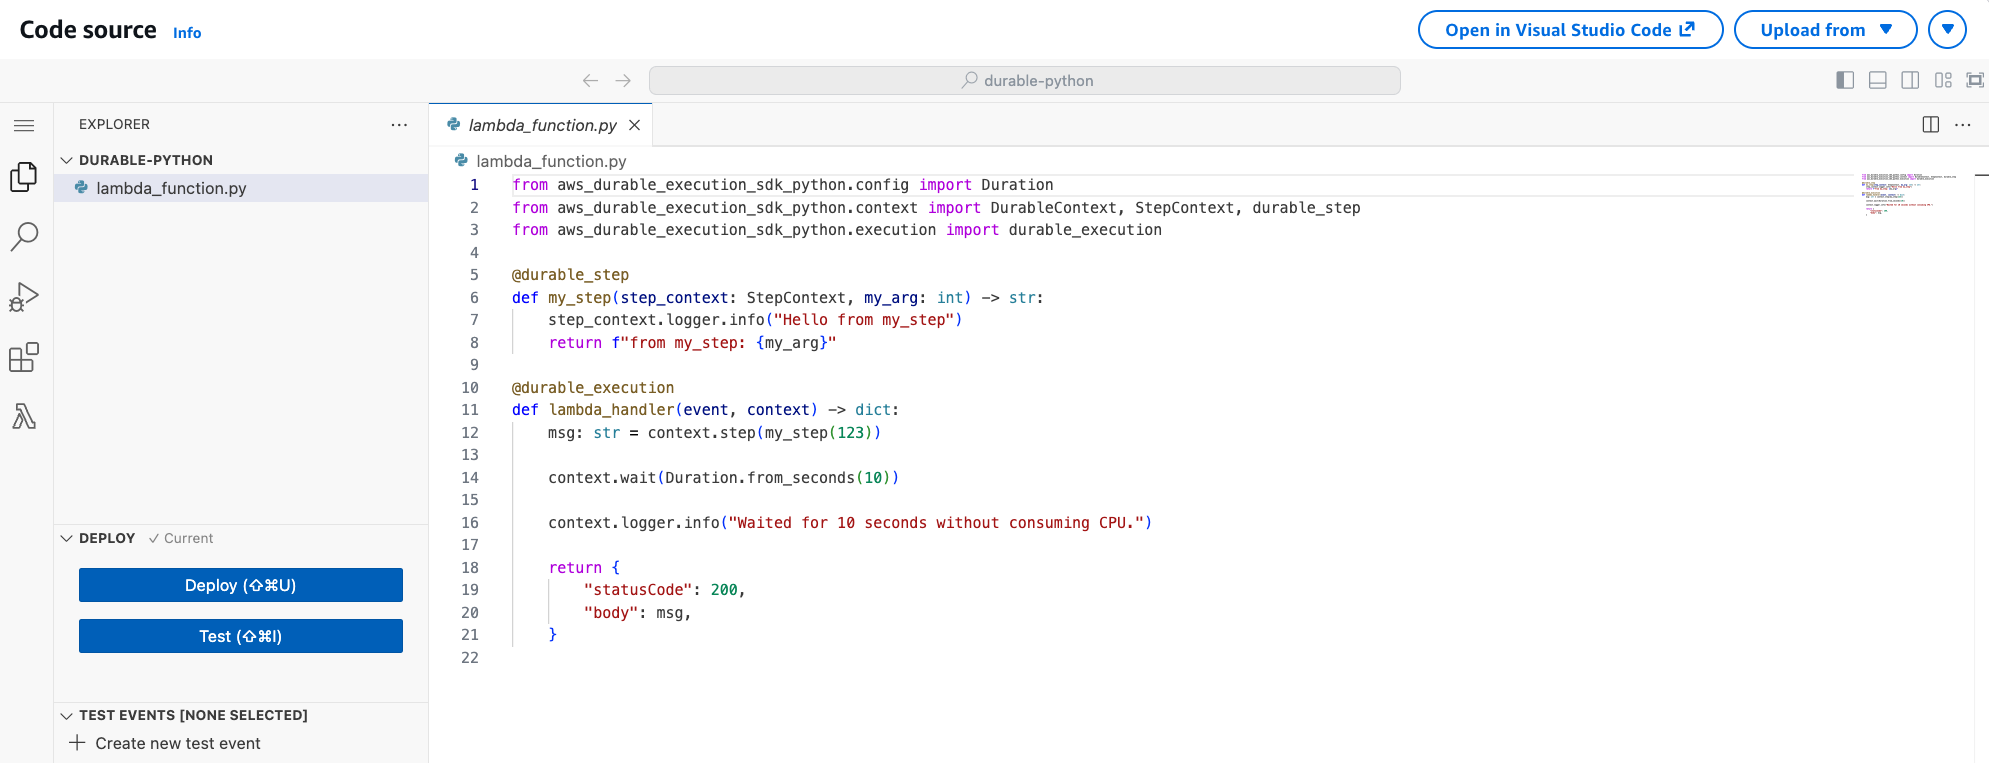
1. Paste the following code into the **lambda\_function.py** tab, replacing the code that Lambda created.
```
from aws_durable_execution_sdk_python import (
DurableContext,
durable_execution,
durable_step,
)
from aws_durable_execution_sdk_python.config import Duration
@durable_step
def validate_order(step_context, order_id):
step_context.logger.info(f"Validating order {order_id}")
return {"orderId": order_id, "status": "validated"}
@durable_step
def process_payment(step_context, order_id):
step_context.logger.info(f"Processing payment for order {order_id}")
return {"orderId": order_id, "status": "paid", "amount": 99.99}
@durable_step
def confirm_order(step_context, order_id):
step_context.logger.info(f"Confirming order {order_id}")
return {"orderId": order_id, "status": "confirmed"}
@durable_execution
def lambda_handler(event, context: DurableContext):
order_id = event['orderId']
# Step 1: Validate order
validation_result = context.step(validate_order(order_id))
# Step 2: Process payment
payment_result = context.step(process_payment(order_id))
# Wait for 10 seconds to simulate external confirmation
context.wait(Duration.from_seconds(10))
# Step 3: Confirm order
confirmation_result = context.step(confirm_order(order_id))
return {
"orderId": order_id,
"status": "completed",
"steps": [validation_result, payment_result, confirmation_result]
}
```
1. In the **DEPLOY** section, choose **Deploy** to update your function's code:

**Understanding your durable function code**
Before you move to the next step, let's look at the function code and understand key durable function concepts.
+ The `@durable_execution` decorator:
Your handler function is decorated with `@durable_execution`. This decorator enables durable execution by providing the `DurableContext` object and managing checkpoint operations.
+ The `@durable_step` decorator:
Each step function is decorated with `@durable_step`. This decorator marks the function as a durable step that creates checkpoints.
+ The `DurableContext` object:
Instead of the standard Lambda context, your function receives a `DurableContext`. This object provides methods for durable operations like `step()` and `wait()` that create checkpoints.
+ Steps and checkpoints:
Each `context.step()` call creates a checkpoint before and after execution. If your function is interrupted, it resumes from the last completed checkpoint. The function doesn't re-execute completed steps. It uses their stored results instead.
+ Wait operations:
The `context.wait()` call pauses execution without consuming compute resources. When the wait completes, Lambda invokes your function again and replays the checkpoint log, substituting stored values for completed steps.
+ Python SDK is synchronous:
Note that the Python SDK doesn't use `await`. All durable operations are synchronous method calls.
------
## Invoke the durable function using the console code editor
When no explicit version is specified (or published), the console invokes the durable function using the `$LATEST` version qualifier. However, for deterministic execution of your code, you must always use a qualified ARN pointing to a stable version.
**To publish a version of your function**
1. Choose the **Versions** tab.
1. Choose **Publish new version**.
1. For **Version description**, enter **Initial version** (optional).
1. Choose **Publish**.
1. Lambda creates version 1 of your function. Note that the function ARN now includes `:1` at the end, indicating this is version 1.
Now create a test event to send to your function. The event is a JSON formatted document containing an order ID.
**To create the test event**
1. In the **TEST EVENTS** section of the console code editor, choose **Create test event**.

1. For **Event Name**, enter **myTestEvent**.
1. In the **Event JSON** section, replace the default JSON with the following:
```
{
"orderId": "order-12345"
}
```
1. Choose **Save**.
**To test your durable function and view execution**
In the **TEST EVENTS** section of the console code editor, choose the run icon next to your test event:

Your durable function starts executing. Because it includes a 10-second wait, the initial invocation completes quickly, and the function resumes after the wait period. You can view the execution progress in the **Durable executions** tab.
**To view your durable function execution**
1. Choose the **Durable executions** tab.
1. Find your execution in the list. The execution shows the current status (Running, Succeeded, or Failed).
1. Choose the execution ID to view details, including:
+ Execution timeline showing when each step completed
+ Checkpoint history
+ Wait periods
+ Step results
You can also view your function's logs in CloudWatch Logs to see the console output from each step.
**To view your function's invocation records in CloudWatch Logs**
1. Open the [Log groups](https://console.aws.amazon.com/cloudwatch/home#logs:) page of the CloudWatch console.
1. Choose the log group for your function (`/aws/lambda/myDurableFunction`).
1. Scroll down and choose the **Log stream** for the function invocations you want to look at.

You should see log entries for each invocation of your function, including the initial execution and the replay after the wait.
**Note**
When you use the logger from the `DurableContext` (such as `context.logger` or `stepContext.logger`), logs also appear in the durable execution and step views in the Lambda console. These logs may take a moment to load.
## Clean up
When you're finished working with the example durable function, delete it. You can also delete the log group that stores the function's logs, and the [execution role](lambda-intro-execution-role.md) that the console created.
**To delete the Lambda function**
1. Open the [Functions page](https://console.aws.amazon.com/lambda/home#/functions) of the Lambda console.
1. Select the function that you created.
1. Choose **Actions**, **Delete**.
1. Type **confirm** in the text input field and choose **Delete**.
**To delete the log group**
1. Open the [Log groups](https://console.aws.amazon.com/cloudwatch/home#logs:) page of the CloudWatch console.
1. Select the function's log group (`/aws/lambda/myDurableFunction`).
1. Choose **Actions**, **Delete log group(s)**.
1. In the **Delete log group(s)** dialog box, choose **Delete**.
**To delete the execution role**
1. Open the [Roles page](https://console.aws.amazon.com/iam/home?#/roles) of the AWS Identity and Access Management (IAM) console.
1. Select the function's execution role (for example, `myDurableFunction-role-{{31exxmpl}}`).
1. Choose **Delete**.
1. In the **Delete role** dialog box, enter the role name, and then choose **Delete**.
## Additional resources and next steps
Now that you've created and tested a simple durable function using the console, take these next steps:
+ Learn about common use cases for durable functions, including distributed transactions, order processing, and human review workflows. See [Examples](durable-examples.md).
+ Understand how to monitor durable function executions with CloudWatch metrics and execution history. See [Monitoring and debugging](durable-monitoring.md).
+ Learn about invoking durable functions synchronously and asynchronously, and managing long-running executions. See [Invoking durable functions](durable-invoking.md).
+ Follow best practices for writing deterministic code, managing checkpoint sizes, and optimizing costs. See [Best practices](durable-best-practices.md).
+ Learn how to test durable functions locally and in the cloud. See [Testing durable functions](durable-testing.md).
+ Compare durable functions with Step Functions to understand when each approach is most effective. See [Durable functions or Step Functions](durable-step-functions.md).