지원 종료 공지: 2026년 10월 30일에 AWS 는 Amazon Pinpoint에 대한 지원을 종료합니다. 2026년 10월 30일 이후에는 Amazon Pinpoint 콘솔 또는 Amazon Pinpoint 리소스(엔드포인트, 세그먼트, 캠페인, 여정, 분석)에 더 이상 액세스할 수 없습니다. 자세한 내용은 Amazon Pinpoint 지원 종료를 참조하세요. 참고: SMS, 음성, 모바일 푸시, OTP 및 전화번호 검증과 관련된 APIs는이 변경의 영향을 받지 않으며 AWS 최종 사용자 메시징에서 지원됩니다.
기계 번역으로 제공되는 번역입니다. 제공된 번역과 원본 영어의 내용이 상충하는 경우에는 영어 버전이 우선합니다.
Amazon Pinpoint용 SMS 메시징을 사용하도록 웹 양식을 생성 및 배포
Amazon Pinpoint를 사용한 SMS 메시징에 AWS 서비스를 사용하는 모든 구성 요소가 이제 준비되었습니다. 마지막 단계는 고객의 데이터를 캡처하는 웹 양식을 생성하고 배포하는 것입니다.
이 단원에서는 다음 단원에서 생성하는 웹 양식의 내용을 구문 분석하는 JavaScript 함수를 생성합니다. 내용을 구문 분석한 후 이 함수는 해당 데이터를 사용자가 Amazon API Gateway 설정에서 생성한 API로 전송합니다.
양식 핸들러를 생성하려면
-
텍스트 편집기에서 새로운 파일을 생성합니다.
-
편집기에서 다음 코드를 붙여 넣습니다.
$(document).ready(function() { // Handle form submission. $("#submit").click(function(e) { var firstName = $("#firstName").val(), lastName = $("#lastName").val(), source = window.location.pathname, optTimestamp = undefined, utcSeconds = Date.now() / 1000, timestamp = new Date(0), phone = $("#areaCode").val() + $("#phone1").val() + $("#phone2").val(); e.preventDefault(); if (firstName == "") { $('#form-response').html('<div class="mt-3 alert alert-info" role="alert">Please enter your first name.</div>'); } else if (lastName == "") { $('#form-response').html('<div class="mt-3 alert alert-info" role="alert">Please enter your last name.</div>'); } else if (phone.match(/[^0-9]/gi)) { $('#form-response').html('<div class="mt-3 alert alert-info" role="alert">Your phone number contains invalid characters. Please check the phone number that you supplied.</div>'); } else if (phone.length < 10) { $('#form-response').html('<div class="mt-3 alert alert-info" role="alert">Please enter your phone number.</div>'); } else if (phone.length > 10) { $('#form-response').html('<div class="mt-3 alert alert-info" role="alert">Your phone number contains too many digits. Please check the phone number that you supplied.</div>'); } else { $('#submit').prop('disabled', true); $('#submit').html('<span class="spinner-border spinner-border-sm" role="status" aria-hidden="true"></span> Saving your preferences</button>'); timestamp.setUTCSeconds(utcSeconds); var data = JSON.stringify({ 'destinationNumber': phone, 'firstName': firstName, 'lastName': lastName, 'source': source, 'optTimestamp': timestamp.toString() }); $.ajax({ type: 'POST', url: 'https://example.execute-api.us-east-1.amazonaws.com/v1/register', contentType: 'application/json', data: data, success: function(res) { $('#form-response').html('<div class="mt-3 alert alert-success" role="alert"><p>Congratulations! You've successfully registered for SMS Alerts from ExampleCorp.</p><p>We just sent you a message. Follow the instructions in the message to confirm your subscription. We won't send any additional messages until we receive your confirmation.</p><p>If you decide you don't want to receive any additional messages from us, just reply to one of our messages with the keyword STOP.</p></div>'); $('#submit').prop('hidden', true); $('#unsubAll').prop('hidden', true); $('#submit').text('Preferences saved!'); }, error: function(jqxhr, status, exception) { $('#form-response').html('<div class="mt-3 alert alert-danger" role="alert">An error occurred. Please try again later.</div>'); $('#submit').text('Save preferences'); $('#submit').prop('disabled', false); } }); } }); }); -
이전 예제에서
https://example.execute-api.us-east-1.amazonaws.com/v1/register를 API 배포에서 획득한 간접 호출 URL로 바꿉니다. -
파일을 저장합니다.
이 단원에서는 고객이 SMS 프로그램에 등록하기 위해 사용하는 양식이 포함된 HTML 파일을 생성합니다. 이 파일은 이전 단원에서 생성한 JavaScript 양식 핸들러를 사용하여 양식 데이터를 Lambda 함수로 전송합니다.
중요
사용자가 이 양식을 제출하면 여러 Amazon Pinpoint API 작업을 호출하는 Lambda 함수가 트리거됩니다. 악의적인 사용자가 다수의 요청이 발생하도록 할 수 있는 양식에 대한 공격을 시작할 수 있습니다. 프로덕션 사용 사례에 이 솔루션을 사용할 계획인 경우, Google reCAPTCHA
양식을 생성하려면
-
텍스트 편집기에서 새로운 파일을 생성합니다.
-
편집기에서 다음 코드를 붙여 넣습니다.
<!doctype html> <html lang="en"> <head> <!-- Meta tags required by Bootstrap --> <meta charset="utf-8"> <meta name="viewport" content="width=device-width, initial-scale=1, shrink-to-fit=no"> <link rel="stylesheet" href="https://stackpath.bootstrapcdn.com/bootstrap/4.3.1/css/bootstrap.min.css" crossorigin="anonymous"> <script src="https://code.jquery.com/jquery-3.3.1.slim.min.js" crossorigin="anonymous"></script> <script src="https://cdnjs.cloudflare.com/ajax/libs/popper.js/1.14.7/umd/popper.min.js" crossorigin="anonymous"></script> <script src="https://stackpath.bootstrapcdn.com/bootstrap/4.3.1/js/bootstrap.min.js" crossorigin="anonymous"></script> <script src="https://ajax.googleapis.com/ajax/libs/jquery/3.3.1/jquery.min.js"></script> <script type="text/javascript" src="SMSFormHandler.js"></script> <title>SMS Registration Form</title> </head> <body> <div class="container"> <div class="row justify-content-center mt-3"> <div class="col-md-6"> <h1>Register for SMS Alerts</h1> <p>Enter your phone number below to sign up for PromotionName messages from ExampleCorp.</p> <p>We don't share your contact information with anyone else. For more information, see our <a href="http://example.com/privacy">Privacy Policy</a>.</p> <p>ExampleCorp alerts are only available to recipients in the United States.</p> </div> </div> <div class="row justify-content-center"> <div class="col-md-6"> <form> <div class="form-group"> <label for="firstName" class="font-weight-bold">First name</label> <input type="text" class="form-control" id="firstName" placeholder="Your first name" required> </div> <div class="form-group"> <label for="lastName" class="font-weight-bold">Last name</label> <input type="text" class="form-control" id="lastName" placeholder="Your last name" required> </div> <label for="areaCode" class="font-weight-bold">Phone number</label> <div class="input-group"> <span class="h3">( </span> <input type="tel" class="form-control" id="areaCode" placeholder="Area code" required> <span class="h3"> ) </span> <input type="tel" class="form-control" id="phone1" placeholder="555" required> <span class="h3"> - </span> <input type="tel" class="form-control" id="phone2" placeholder="0199" required> </div> <div id="form-response"></div> <button id="submit" type="submit" class="btn btn-primary btn-block mt-3">Submit</button> </form> </div> </div> <div class="row mt-3"> <div class="col-md-12 text-center"> <small class="text-muted">Copyright © 2019, ExampleCorp or its affiliates.</small> </div> </div> </div> </body> </html> -
위 예에서
SMSFormHandler.js를 이전 단원에서 생성한 양식 핸들러 JavaScript 파일의 전체 경로로 바꿉니다. -
파일을 저장합니다.
이제 HTML 양식과 JavaScript 양식 핸들러를 생성했으므로 마지막 단계는 이러한 파일을 인터넷에 게시하는 것입니다. 이 단원에서는 기존 웹 호스팅 공급자가 있다고 가정합니다. 기존 호스팅 공급자가 없는 경우 Amazon Route 53, Amazon Simple Storage Service(S3) 및 Amazon CloudFront를 사용하여 웹 사이트를 시작할 수 있습니다. 자세한 내용은 정적 웹 사이트 호스팅
다른 웹 호스팅 공급자를 사용하는 경우, 웹 페이지 게시에 대한 자세한 내용은 해당 공급자의 설명서를 참조하세요.
양식을 게시한 후 몇 가지 테스트 이벤트를 제출하여 양식이 예상대로 작동하는지 확인해야 합니다.
등록 양식을 테스트하려면
-
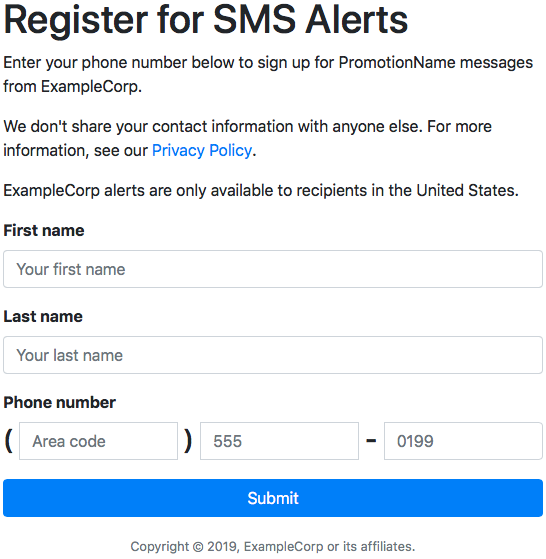
웹 브라우저에서 등록 양식을 업로드한 위치로 이동합니다. JavaScript 양식 핸들러 생성에서 코드 예제를 사용한 경우 다음 이미지의 예제와 비슷한 양식이 표시됩니다.
-
이름, 성 및 전화 번호 필드에 연락처 정보를 입력합니다.
참고
양식을 제출하면 Amazon Pinpoint는 지정한 전화 번호에 메시지를 전송합니다. 이 기능 때문에 처음부터 끝까지 실제 전화 번호를 사용하여 솔루션을 테스트해야 합니다.
Lambda 함수 생성에서 Lambda 함수를 테스트한 경우 Amazon Pinpoint 프로젝트에 이미 하나 이상의 엔드포인트가 포함되어 있습니다. 이 양식을 테스트할 때 양식에서 다른 전화 번호를 제출하거나 DeleteEndpoint API 작업을 사용하여 기존 엔드포인트를 삭제해야 합니다.
-
지정한 전화 번호와 연결된 디바이스를 점검하여 이 디바이스가 테스트 메시지를 수신했는지 확인합니다.
https://console.aws.amazon.com/pinpoint/
에서 Amazon Pinpoint 콘솔을 엽니다. -
모든 프로젝트 페이지에서 Amazon Pinpoint 프로젝트 생성에서 생성한 프로젝트를 선택합니다.
-
탐색 창에서 세그먼트를 선택합니다. 세그먼트 페이지에서 세그먼트 생성을 선택합니다.
-
세그먼트 그룹 1의 필터를 추가하여 세그먼트 세분화 아래에서 엔드포인트를 기준으로 필터링을 선택합니다.
-
사용자 속성 선택에서 FirstName을 선택합니다. 그런 다음 값 선택에서 양식을 제출할 때 지정한 이름을 선택합니다.
다음 예제와 같이 세그먼트 추정치 섹션에 사용 가능 엔드포인트 0개와 엔드포인트 하나(전체 엔드포인트 아래)가 있다고 표시되어야 합니다. 이 결과가 예상됩니다. Lambda 함수가 새 엔드포인트를 생성하면 엔드포인트가 기본적으로 옵트아웃됩니다.

-
메시지를 수신한 디바이스에서 양방향 SMS 활성화에서 지정한 양방향 SMS 키워드로 메시지에 회신합니다. Amazon Pinpoint는 응답 메시지를 즉시 전송합니다.
-
Amazon Pinpoint 콘솔에서 4~8단계를 반복합니다. 이번에는 세그먼트를 생성할 때 엔드포인트 8개와 전체 엔드포인트 하나가 보입니다. 엔드포인트가 이제 옵트인되어 있으므로 이 결과가 예상됩니다.
