Enable agent-initiated flows during active chat sessions
Agent-initiated workflows are interactive workflows that agents can trigger during active chat sessions with customers. This feature enables agents to send forms for data collection, process payments, update customer profiles, and initiate automated processes while maintaining direct interaction with customers within the chat experience.
Benefits
Agent-initiated flows provides the following benefits:
-
Simplify customer task completion by keeping interactions within the chat interface
-
Enable agents to provide real-time assistance during form completion
-
Support sensitive data collection through Show View blocks with sensitive data configuration options
Where you can use agent-initiated flows
You can use agent-initiated flows in chat channels, including:
-
Web chat
-
SMS
-
WhatsApp Business
-
Apple Messages for Business
Voice and other channels are not currently supported.
Limitations
-
The supported Quick Connect "FLOW" type only work for chat channels (web chat, SMS, WhatsApp Business, Apple Messages for Business).
-
Only Inbound Flows are supported
-
Transfers and adding new participants will not work during an ongoing agent-initiated workflow. The workflow needs to be either completed or cancelled before adding a new agent or contact.
-
Only one agent-initiated flow can execute at a time per contact
-
The following flow blocks are not supported: Connect assistant, Authenticate Customer, Create Persistent Contact Association, Get Customer Input
-
Limited to 10 Agent-initiated flows per Chat
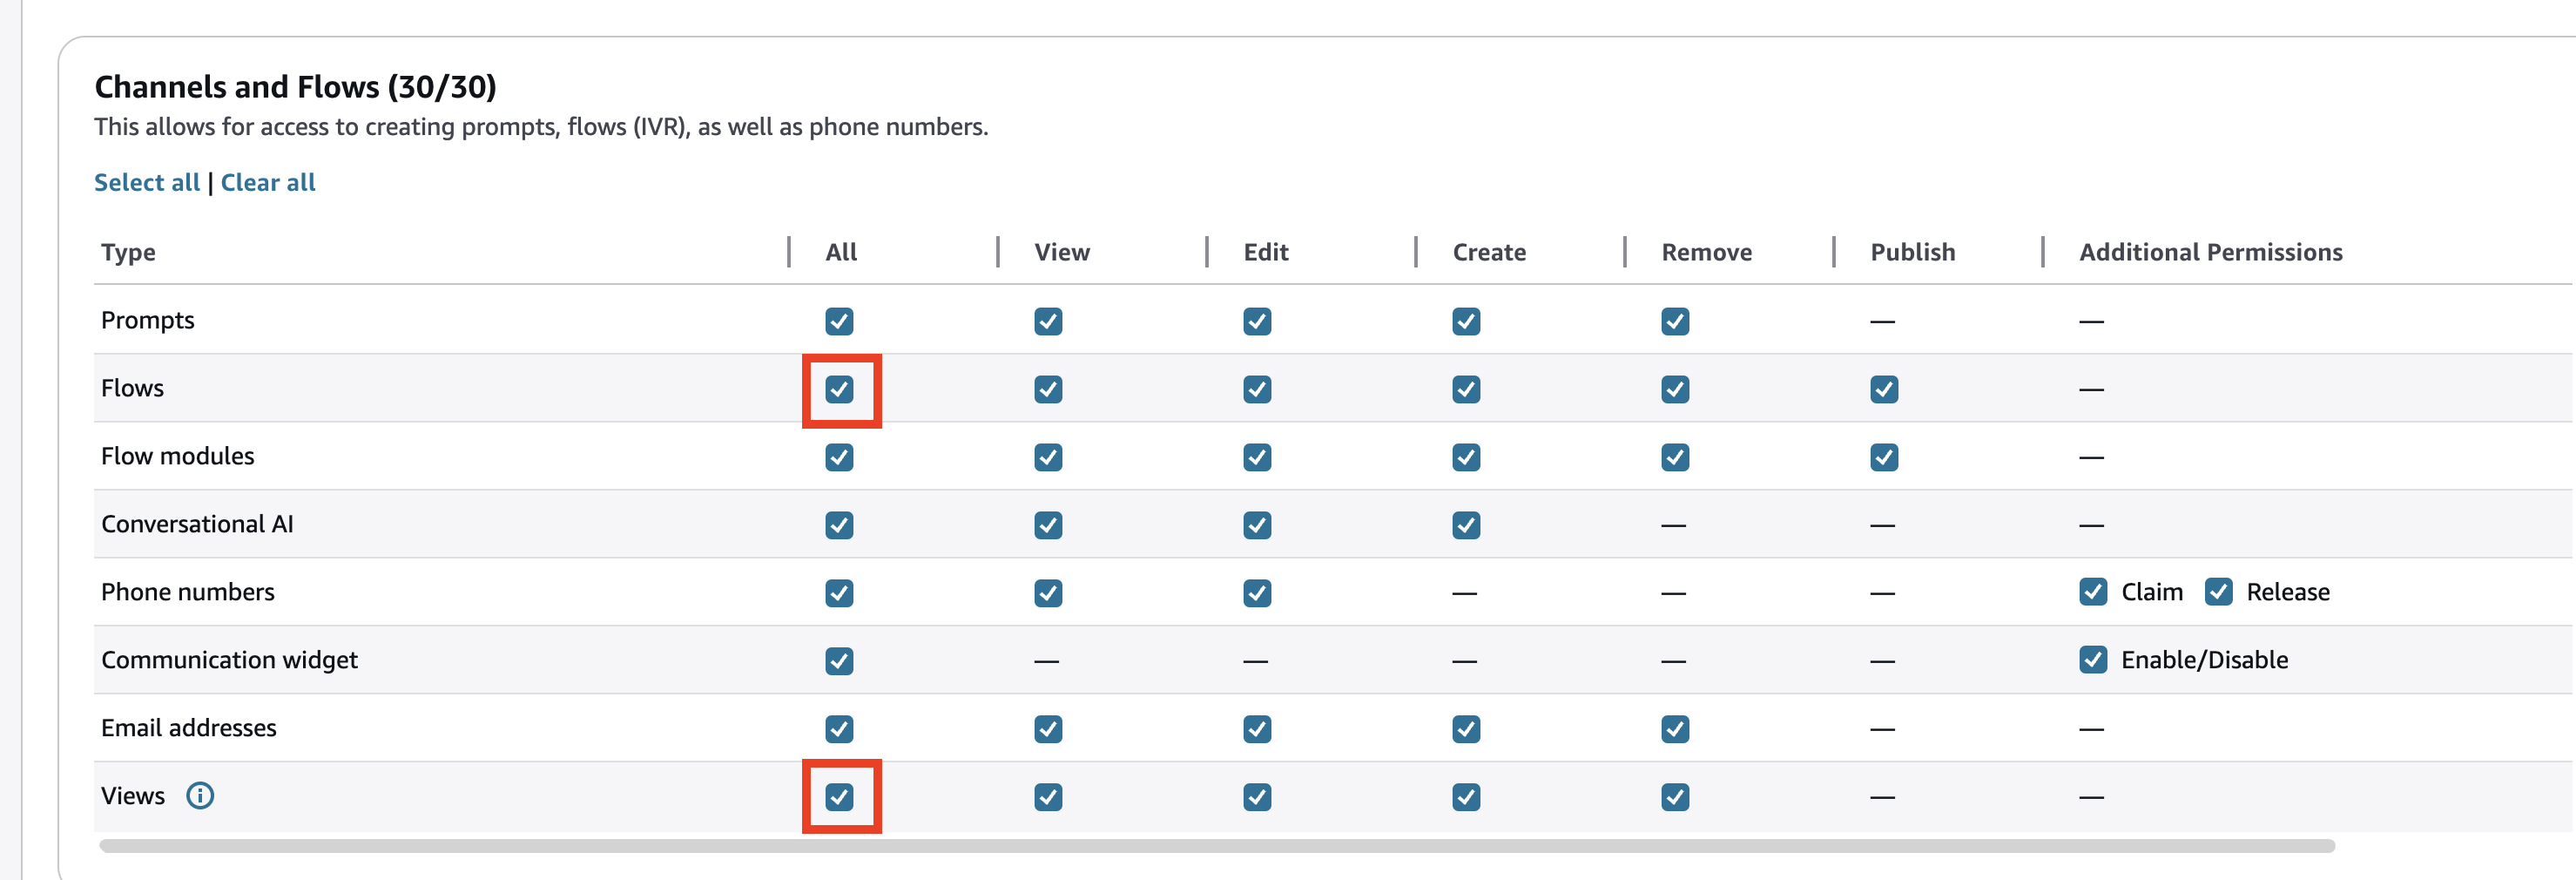
Security profile permissions for agent-initiated flows
Before you can create agent-initiated flows, you must have permissions in your security profile.
The required permissions are:
-
Channels and flows - Views
-
Routing - Quick Connects
Create Quick Connect for agent-initiated flow
-
On the navigation menu, choose Routing, Quick connects.
-
Choose Add new.
-
For Type, select Flow.
-
Select a specific Inbound Flow for agents to send.
-
Choose Save.

Associate Quick Connect with queue
-
On the navigation menu, choose Routing, Queues.
-
Select the queue where agents will use this flow.
-
In the Quick connects section, add your Quick Connect.
-
Choose Save.

For additional details on quick connects, see Create quick connects in Connect Customer.
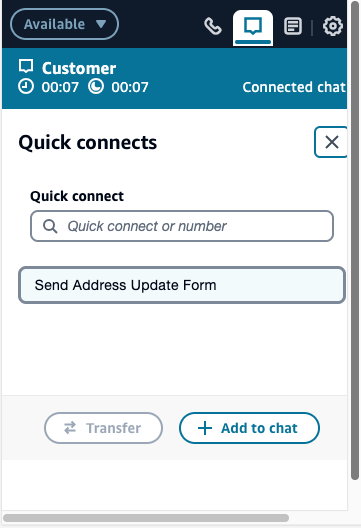
Send Form to Customer
-
On agent control panel, select the Quick connect button at the action bar
-
On the selection menu, choose the appropriate form
-
Select Add to chat

When the form is active, the agent may cancel the workflow. Agents will see events for the status of the workflow.


Receive Form from Agent
-
Customer will receive the respective form to fill out
-
Customers and agents continue ongoing conversation during the active form
-
Upon submission, the agent will be notified through new events


